Those who begin with the extreme macro, already had occasion after the first acquisitions (and the first desperate dissatisfaction), to have obtained images a little “dull”, especially using lenses of large diameter (although the same phenomenon occurs even with microscope lenses). In my case, I recently obtained, using an inverted Schneider-Componon-S 2.8/50mm lens, images that had a bright halo in the centre of the image. The halo that at first, I thought was due to the arrangement of the lateral light panels, but despite the different configurations and orientations, this halo continued undaunted to make me restless nights (…).
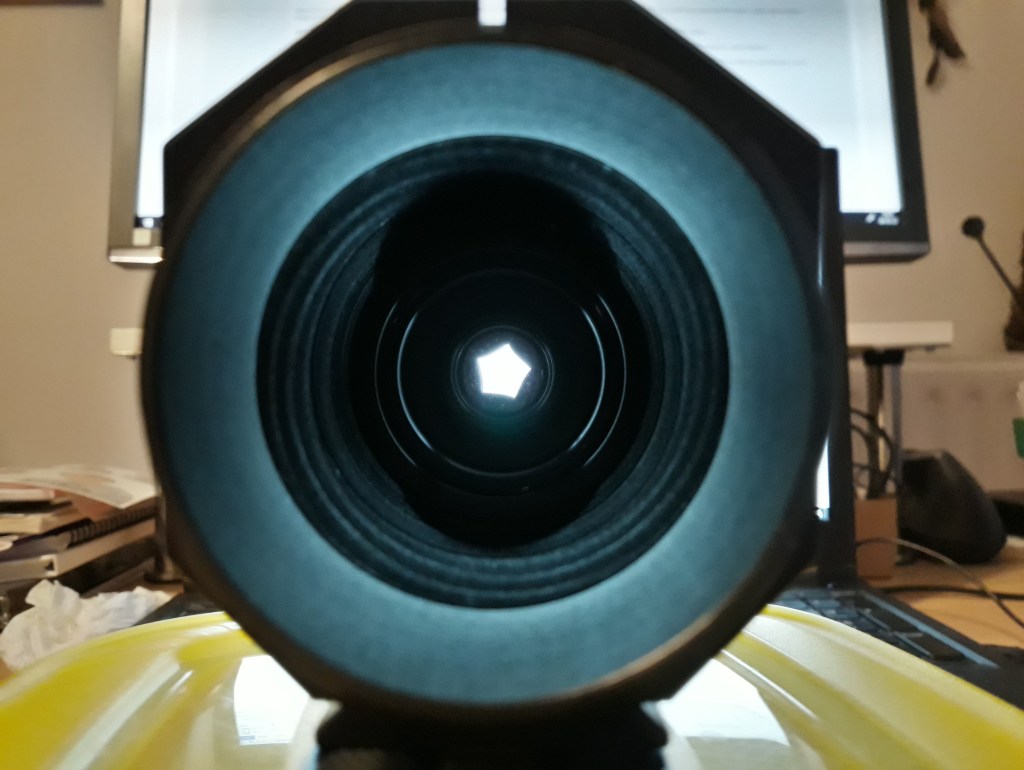
The following picture shows the resulting image. The central part of the image is clearly affected by this bright halo, which heavily alters the image quality.

Acquiring an image with a completely dark surface, further shows how the light halo emerges from the dark background.

Trying to insert a lens hood in front of the front lens did not allow to obtain better results. The nasty phenomenon appeared after putting in place a new configuration of the extension tube, conceived specifically for the Componon lens. Observing through a strong light source I noticed that inside the tube there were important light reflections, which bounced along the walls, and part of the reflections also bounced from the metal of the bayonet ring.
The methods to remove these unwanted reflections are mainly two: either insert an opaque velvet board or apply a matte paint that eliminates all reflections. There are different models and brands on the market to eliminate this problem, and some products can be found here: https://www.mjkzz.de/collections/black-color
Be careful that the paint sets firmly to the interior metal surface once applied and does not come off and risk ending up on the lens, or worse, the camera sensor. Similarly, the velvet paper should not shed hairs, as these too could settle on the sensor.
I opted for a velvety cardboard Hahnemühle (purchased here: https://www.geant-beaux-arts.be/papier-velours-hahnemuehle.html ) that given the rigidity does not need to be glued inside the tube, resulting easily insertable and removable in case you want to lengthen or shorten the extension tube to get different magnifications.
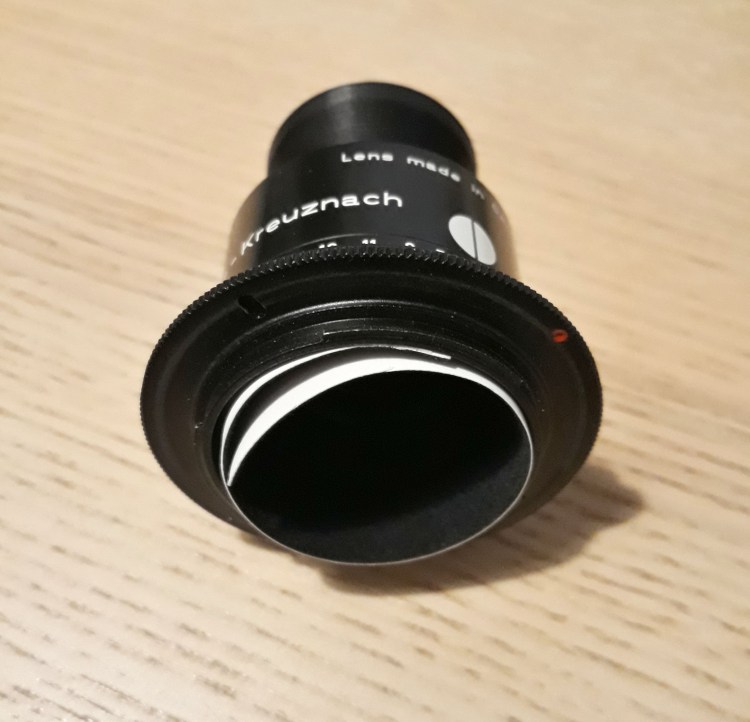
Using a black vinyl emulsion multi-support and anti-reflection (https://www.lefrancbourgeois.com/fr/flashe-vinylique/ ) I also covered all the bright metal parts that could be the cause of additional internal reflections.
Since I use extension tubes with a diameter of 57mm, the longer side of the rectangle of cardboard to be inserted into the tube was cut with a length of ~17cm.
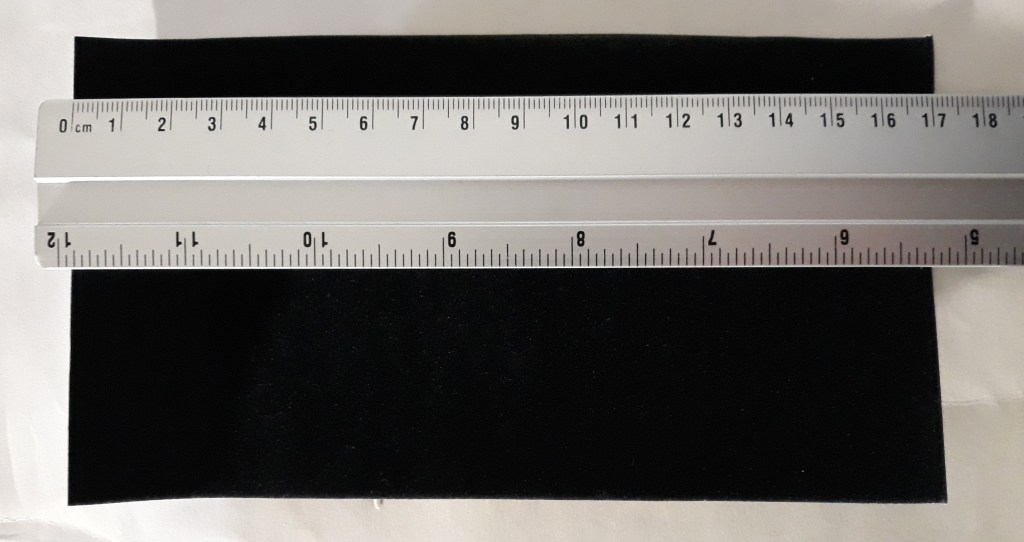
Obviously, the shorter side will vary depending on the length of the extension tube you have. A second smaller cylinder was also inserted at the base of the Componon lens, as secondary reflections were also showing at the base of the lens.

Once the new set-up is installed with the cardstock fixed inside and the metal walls matted, it is evident that most of the reflections have now been completely removed.

Acquiring the same black background, and leaving the parameters of the camera unchanged, it is evident that now the image is much more homogeneous, without the presence of the halo, and darker, this is visible also analyzing the histogram, narrower than the previous one.

The same subject previously acquired no longer has the central halo, now displaying a homogeneous image ready to be further processed and published.

Interesting discussions are present in the forum photomacrography, which I suggest reading for more feedback on the methodology. You can find the threads here: https://www.photomacrography.net/forum/viewtopic.php?f=8&t=35350 and here: http://www.photomacrography.net/forum/viewtopic.php?t=17917
In my setup, the “flocking” is applied to the tube that supports the Componon lens, but obviously, the same procedure must be carried out on the tubes that support the microscope optics.
Happy stacking!
