How much does the processing of an image affect its quality compared to one that comes out from the stacking software used?
Do standardized techniques exist?
Before getting into the heart of the matter, it is necessary to make a brief introduction about the two leading image stacking programs: Helicon Focus and Zerene Stacker. [I haven’t the Zerene software installed on my computer, so forgive me for any mistakes that I will be quick to correct if necessary].
The following image shows the Helicon Focus and Zerene Stacker programs running:

Data Input:
Helicon Focus can import files in .JPG (8 bit), .TIF (8 bit or 16 bit), .DNG (Digital Negative, a format developed by Adobe, open) and many RAW formats created by the various manufacturers of the most popular cameras (.ARW for Sony, .NEF for Nikon, .CR3 for Canon…), while Zerene Stacker only allows you to import .JPG (8 bit), and .TIF (8 bit or 16 bit) formats.
The problem with the .TIF format is that not all cameras allow you to save images directly in this format, so if you want to keep intact the 16-bit encoding (and not use the .JPG format), you must convert all frames from RAW to .TIF, before importing in Zerene Stacker the series of images to be compiled.
Data Output:
The format exported of the compiled images is slightly different in the two software, with Helicon Focus able to export files in .DNG (16 bit), .JPG (8 bit), and .TIFF (8 bit or 16 bit), while Zerene Stacker only .JPG (8 bit) and .TIFF (8 bit or 16 bit). Please note that the export in .DGN format is possible only if you have installed the Pro license in Helicon Focus.
Why complicate your life using a RAW format and not working with the lighter and easier .JPG? I will partly summarize what is written on Wikipedia about the benefits of using the RAW format in photography.
Using the JPG format means that the image we receive has already undergone a process (total or partial) of color balance, saturation, contrast, and sharpness. The parameters are calculated automatically or defined by the photographer BEFORE the image is captured, so it is no longer possible to make profound changes on these values. Exporting in RAW format allows to get access equally to images that are already pre-processed by the camera software, but these settings are completely manageable, editable, and can be improved during the post-processing. Of course, this requires an additional step before importing the image set into our stacking software.
The RAW format has considerable advantages over the JPG format, such as:
– It has many more shades of colors (4096 to 16384) than the 256 shades of a compressed 8-bit JPG;
– It has higher image quality. Since all image treatments (such as gamma correction, demosaicing, white balance, brightness, contrast…) used to generate pixel values are done in one pass on the basic data, the resulting pixel values will be more accurate and will show less of the posterization phenomenon (defined as an effect applied to an image which it is compressed, reducing the number of color levels, increasing contrast, but decreasing the nuances);
– The standardized steps performed by the camera, such as sharpening and noise reduction, are avoided to leave the operator free to optimize these parameters;
– JPG images are usually saved using a compression format that corresponds to a certain loss in quality. RAW formats generally use a compression technology that does not alter the pixel value (lossless), without data loss and quality;
– Exporting in .DNG or .TIF format (16 bit) allows to have an output file with much more important dynamics, and this is particularly interesting if you want to highlight image sectors that have dark or light areas. Moreover, in the professional printing phase (large posters and in CMYK color space), the JPG format risks to present in correspondence of high chromatic contrast areas artifacts due to the compression process;
– Finer control. RAW image conversion software generally allows the user to modify more parameters (such as brightness, white balance, hue, saturation, etc.) and manage them with more freedom. For example, the white point can be set to any value, not just discrete defaults values such as “daylight” or “incandescent”, and similarly the colorimetric calibration, which is particularly important when you want to keep the real colors of the photographed subject;
– It is possible to use different demosaicing algorithms, an operation that allows reconstructing the color representation of an image starting from the raw data obtained from the sensor of a digital camera, and not only the one encoded in the camera itself;
– The content of the RAW files contains more information and potentially higher quality than the converted .JPG results, where the rendering parameters are fixed, the color gamut is reduced and there may be quantization artifacts (due to the compression technique with loss of information and colors);
– Transformations of luminance values, for example, if you increase the exposure of a strongly underexposed photo, result in fewer visible artifacts than if you perform the same process on an already rendered image;
– All changes made to a RAW file are non-destructive; that is, only the metadata that controls rendering is modified to make the different output versions unchanged, leaving the original data unchanged.
There are, of course, disadvantages to using the RAW format:
– RAW file sizes are typically two to six times larger than JPG file sizes, a function of course of the level of compression. This requires the use of SSD memory cards with higher storage volume and fast access; you must also take into account that a macro-extreme image capture session can involve hundreds of images and easily occupy a dozen (or more) of Gigabytes;
– The different RAW formats are not always compatible with processing software (which must always undergo to frequent updates), while the .DNG format, a potential candidate to become a universal standard format, has not yet been officially adopted by all camera manufacturers. This has led to the creation of several RAW formats in time, and the abandonment of others, following the evolution of data storage technology;
– The time required in applying the usual workflow in image processing is an important factor when choosing between unprocessed and ready-to-use image formats. With modern stacking software, the time required to process unprocessed images has been greatly reduced, while still requiring additional steps in the workflow compared to using a simple JPG.
Working with a RAW file (in Camera RAW):
RAW files are generally easily imported within Adobe products, and despite having a relatively old version of this software, I have never had any problems whatsoever reading and viewing files in Camera RAW. However, there are many platforms, open-source or not, that can import and process RAW formats without any problem.
The operations performed, such as correcting exposure values, color distribution, contrast, light and dark levels… are automatically saved in an .XMP file that will accompany each RAW image. This file contains all the information (metadata) about the changes made to the images, changes that do not affect the source image.
After this operation, you can import the files into Helicon Focus and start the compilation process. Warning! Helicon Focus does not recognize the .XMP file as such, so when you view the image in this software, it will appear as if it was not processed on Camera RAW.
After the stacking process is finished, the result is exported in .DNG format and opened again in Camera RAW. The image is displayed applying the parameters defined before importing the individual files into Helicon.
Working in this mode means that you don’t have to convert RAW files to .TIF or .JPG format once they have been exported from the camera, and consequently save time in processing the data, although the calculation process in Helicon Focus is slower compared to using a JPG format.
Regardless of the software used, the treatments that are applied to the final image are in principle very standardized, but depending on the subject photographed and the level of ability acquired by the photographer.
Below I will briefly illustrate the steps I perform to calculate a decent image.
1– Preparation Operation:
Correct positioning of the light source(s). This deserves a separate chapter that I will create soon on another page;
Calculation of the number of steps required to cover all the subject (operation automatically done by the computer connected to the rail and the camera) and function of the size of the single step;
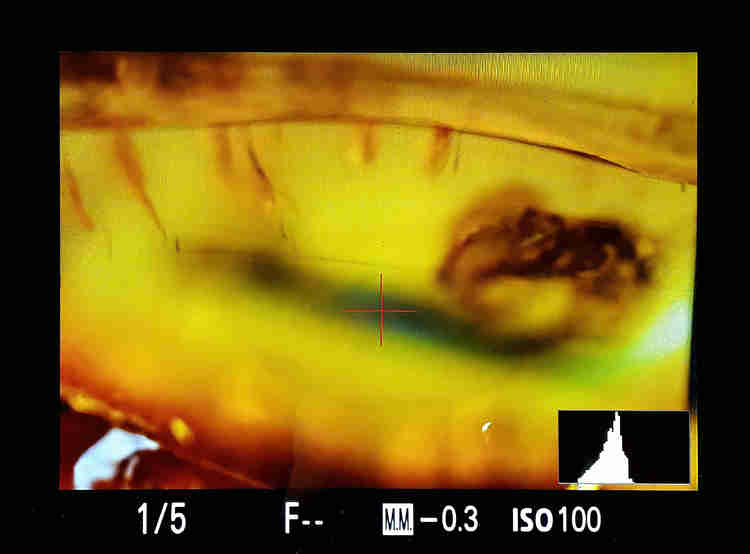
Choice of shooting times. Here the luminance values in the histogram must be as centered as possible, and the curve (must tends to be) a Gaussian one.
This histogram is generally accessible on the camera screen;
2– Depending on the size of the subject, the lenses used, the detail you want to get, the time required to complete the acquisition can vary from ten minutes to more than an hour;
3– The files in RAW format obtained during the acquisition session are imported into Camera RAW where you start to make changes to the image.
4– The correct exposure, to optimize the luminance curve of each channel, is one of the first operations. This allows me to obtain a good image dynamic over (almost) the whole range of pixel values, from black (which is located on the left of the histogram) to white (which is located on the right of the histogram).
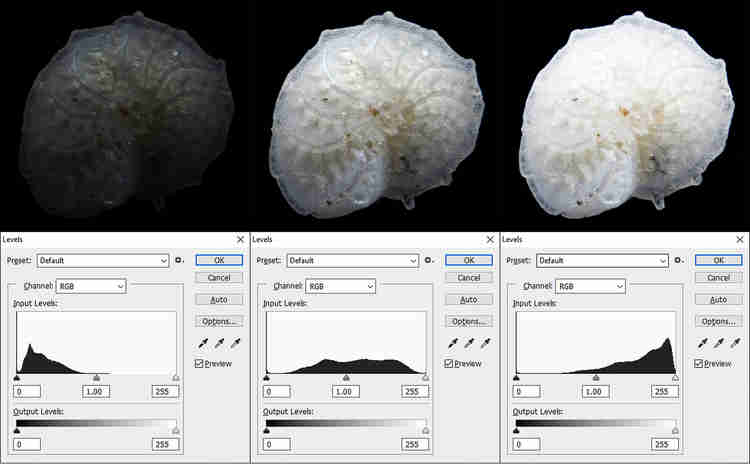
Generally, I do not tend in this phase of work to move the extreme values of the curve at the ends (i.e. to under-saturate or over-saturate if I am in the presence of a black or white background), but I leave a 5-10% area without values. Balancing is done using the sliders that handle the highlights, white, shadows, and black. The values of Saturation, Vibrance, Texture, Clarity, Dehaze are not modified and will be modified after calculating the stack. Modifying these values risks increasing the visibility of background noise in every single frame, affecting the final quality of the stack.
5– Once finished setting the parameters, the operations are saved in a metadata file in .XMP format (using Camera RAW).
The RAW files are now ready to be imported into Helicon Focus; as previously stated, this software does NOT recognize the .XMP file, so the changes made in Camera RAW on the images will not be displayed on the screen. When stacking I use both Method B and Method C (in Zerene Stacker Method B corresponds to DMap, and Method C to PMax). This allows me to compare the results obtained with the two methods, and move on to the retouching process, replacing the best-calculated areas with one method with those of the other. Generally, I use Method B (less subject to reflection of shiny surfaces), to which I add the parts that are better represented with Method C (that offer a better rendering in correspondence of complex superimposed structures). The Helicon retouching tool is very simple and efficient.
In the next image, I have highlighted some differences that can be observed using the two methods B (left) and C (right).

7– The file, once the correction process is finished, is exported in .DNG format and imported back into Camera RAW. The software recognizes the presence of metadata in .XMP format, and displays the file with the corrections made in the initial phase of treatment. If necessary, now you can make operations like rotate, crop, increase or decrease of contrast and saturation levels. Finally, I switch to Adobe Photoshop (PS).
8– Generally the first operation I perform is the removal of the sensor noise, using the program Topaz DeNoise (it can be accessed either as a filter, starting from PS, or as an independent platform). This software allows you to remove noise while also increasing contrast using artificial intelligence algorithms. I find it excellent. The noise is generally not particularly visible, capturing images at 100 ISO, but often the graininess of the digital image emerges when working on parameters such as contrast and texture.

9– The second operation is the removal of any traces, spots, dust, scratches, or anything else that make the image unattractive or “dirty”. PS allows you to remove many of these imperfections without major problems, and the main tools used are the Spot Healing Tool, the Clone Stamp Tool, the Brush (paying attention to correctly sample the background color and correctly adjust the values of Opacity and Flow of the brush), and for some halos that can occur when there are abrupt color changes (such as from the white of a shell to the black of the background) also the Burn Tool. You should not go “heavy-handed” because the changes, if you do not pay attention, will be easily visible once you exceed a certain “threshold” of correction.
Application of the Spot Healing Tool:

Application of the Clone Tool:

Application of the Brush Tool:

Application of the Burn Tool:

10– The retouching process comes to an end with the application (if necessary) of the Sharpen AI filter (also from Topaz). Again, the results that this software allows to obtain are very impressive.

11-Finally, we proceed to the positioning of the reference scale (should always be mandatory). The procedure for calculating the scale as a function of the magnification used is simple on PS, but I will return to the subject in a later post.
12– The file is saved in .PNG and .PSD format and archived for future use.
What is described in these pages may vary depending on the subject being photographed. A 500µm diameter foraminifera will require an acquisition process that will undoubtedly be different from that required to photograph a 5cm long insect with antennae, spines, and bristles on its carapace.
Image created on Helicon Focus (left), and after processing on Photoshop (right):

Techniques and results evolve with time and skill, which is fatally acquired by trying and retrying [so it was useless to read these pages, to learn you “only” have to do].
The important thing is to never let your guard down, and patience rewards.
Happy stacking!
