This function (also called slabbing operation) is present in the versions of the competing software Zerene Stacker, Helicon Focus and the excellent open source ShineStacker
This software includes, among other features, a function that allows you to create substacks in an intuitive and functional way. The substacking process is used to remove in the editing phase those horrible phenomena of transparency and halos present between the subjects in the foreground and those in the background.
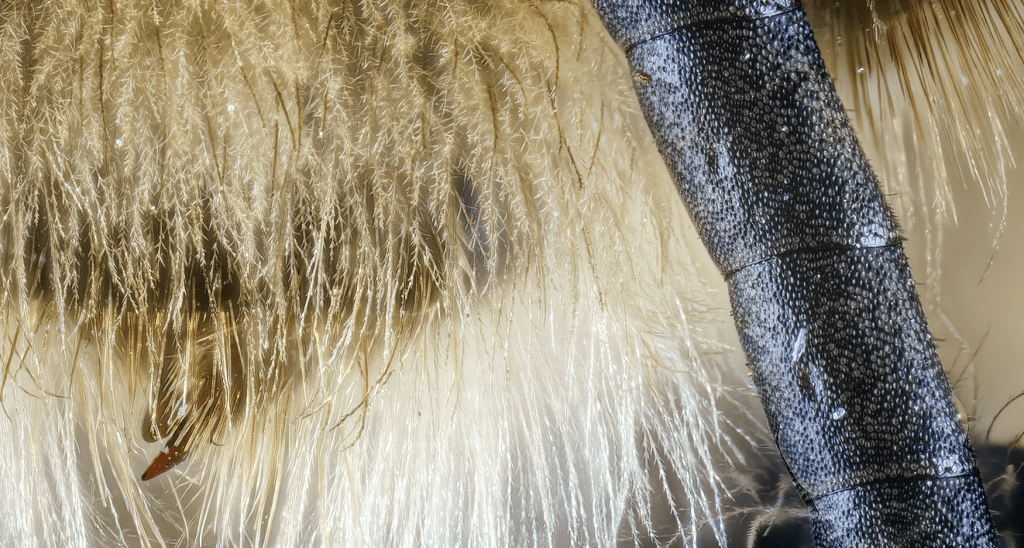
Once you have created the image from the merged computed substacks, you select the intermediate images (substacks) and work with the editing tools to replace the incorrectly compiled parts. This is particularly useful when you have hairs, bristles, legs or antennae that are in the foreground, and overlap with complex parts that are in the background.
For example, an image acquired with a Mitutoyo 10x lens and with a ~5µm step originates a very important number of frames. With this low DOF, the process of image correction based on individual frames (sometimes more than a hundred) is particularly tedious.
The fact of using packages of substacks created from the fusion of about ten-twenty images (the number of images is user-defined, and there is no common rule), makes editing easier, less “time-consuming”, and the final result is clean and correctly displayed image.
If you compile the image, based only on the substacks, the result without the operation of editing, is not particularly different from the one you get by compiling the whole set of images in one single step. It is the possibility of making corrections from the single image stacks that allow you to get a better result.
How to operate? Here is step by step how to create a substacking:
From the File menu you access the section Batch process… (or by pressing the F7 key):

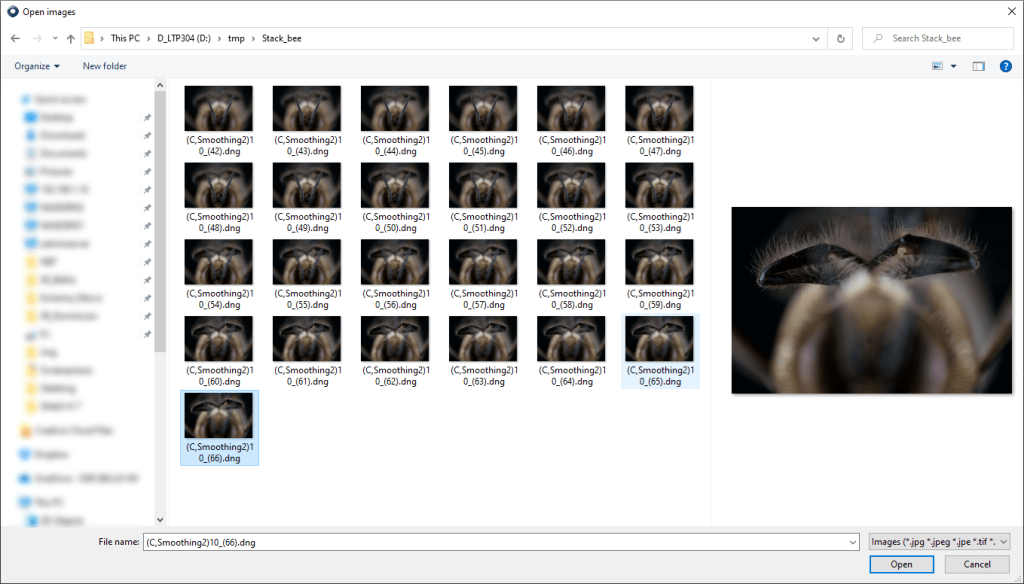
In the new window, import the images that you want to compile to create the substacks. At the bottom right you can select the folder containing the images or select them manually to import them into the platform. Acquiring in RAW format during my photographic sessions I feared the compatibility of the file format; instead, Helicon imports without problem the files in ARW format (SONY raw format).
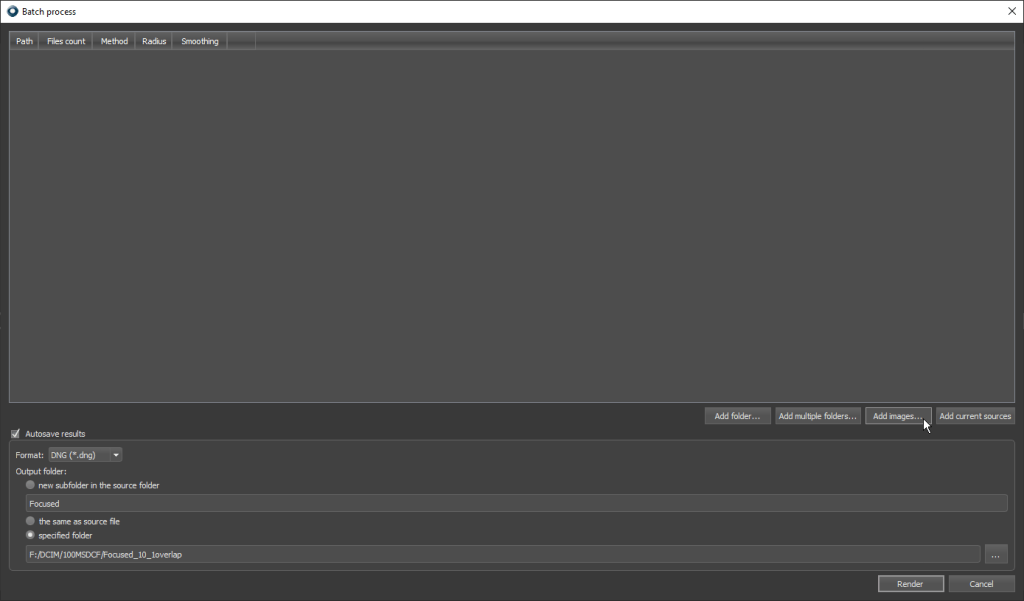
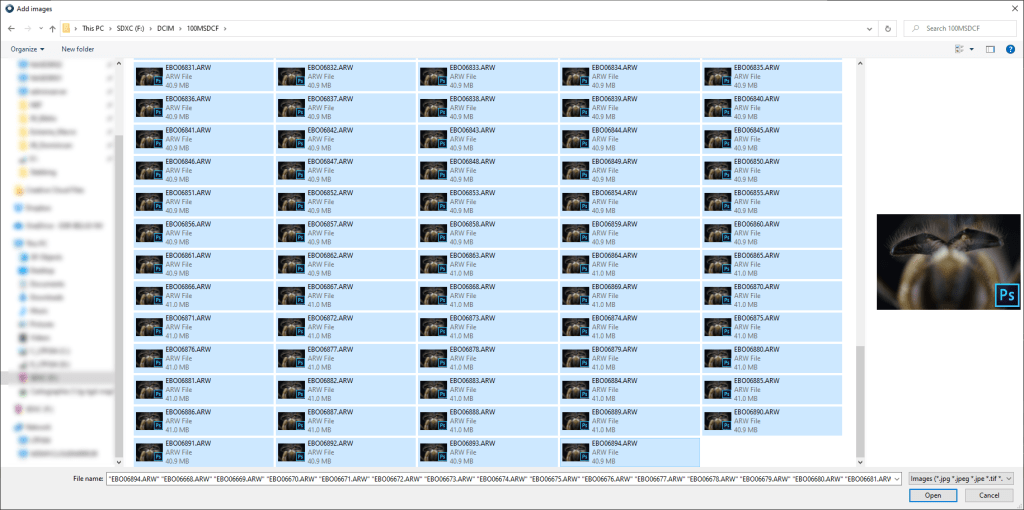
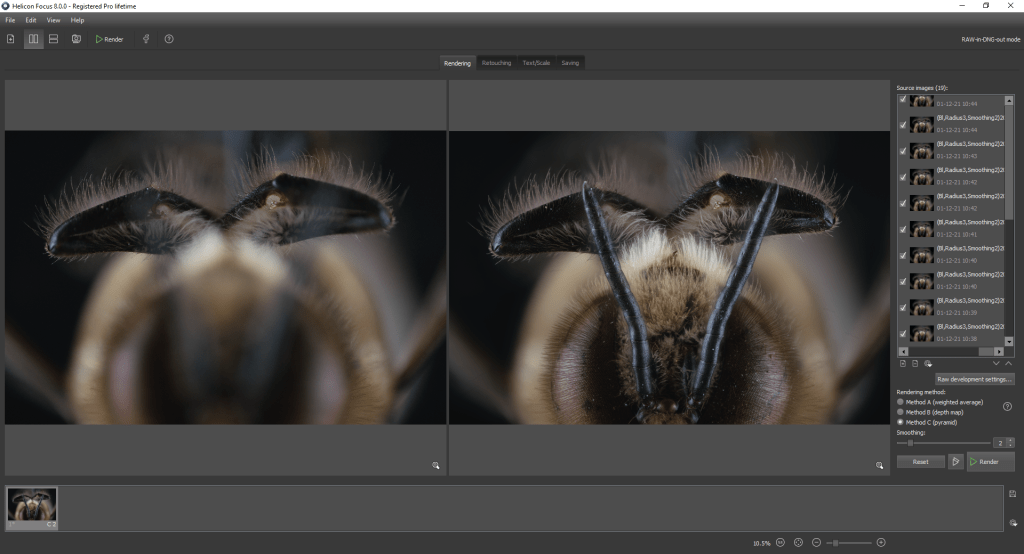
Select the images you want to compile (in this example I have a set of 227 photos of a hairy bee) and import them directly into the window.
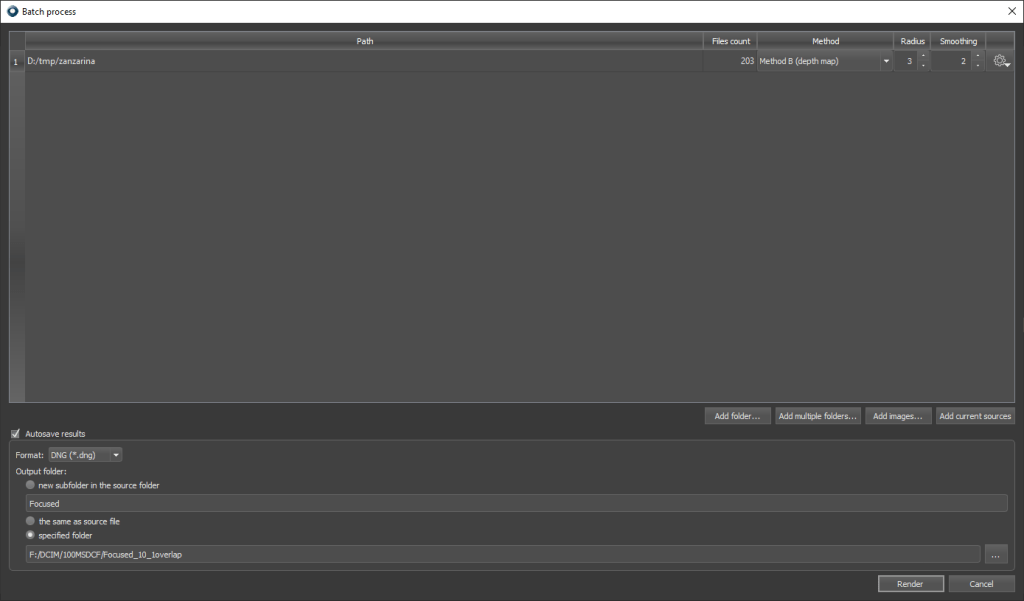
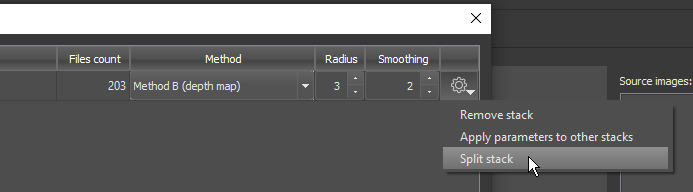
A new row appears at the top, summarizing the number of images and the stacking Method you want to use. Selecting the button on the right, access a menu that allows you to activate the Split stack option.
In the window that appears you define the number of images that compose the single stack, the overlap between the previous and next substack (this option was not present in the 7.x versions, and this is what makes the difference…), and you are ready to start the sub-stacking process.
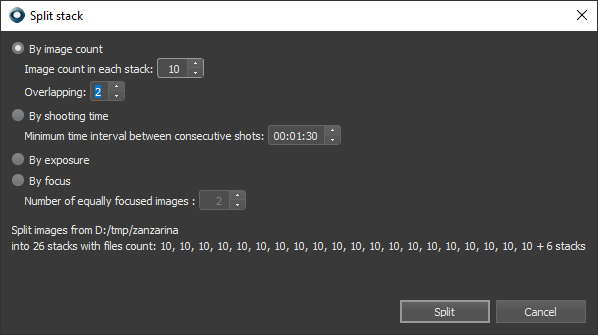
You then get a series of substacks, the number of which is a function of the parameters entered. It is possible to differentiate the method to be applied (Method B or Method C, generally) for each substack, in order to optimize the treatment process, as well as the parameters related to Radius and Smoothing. Finally, we define the output format (.dgn, .tif, .jpg) and we can start the rendering.
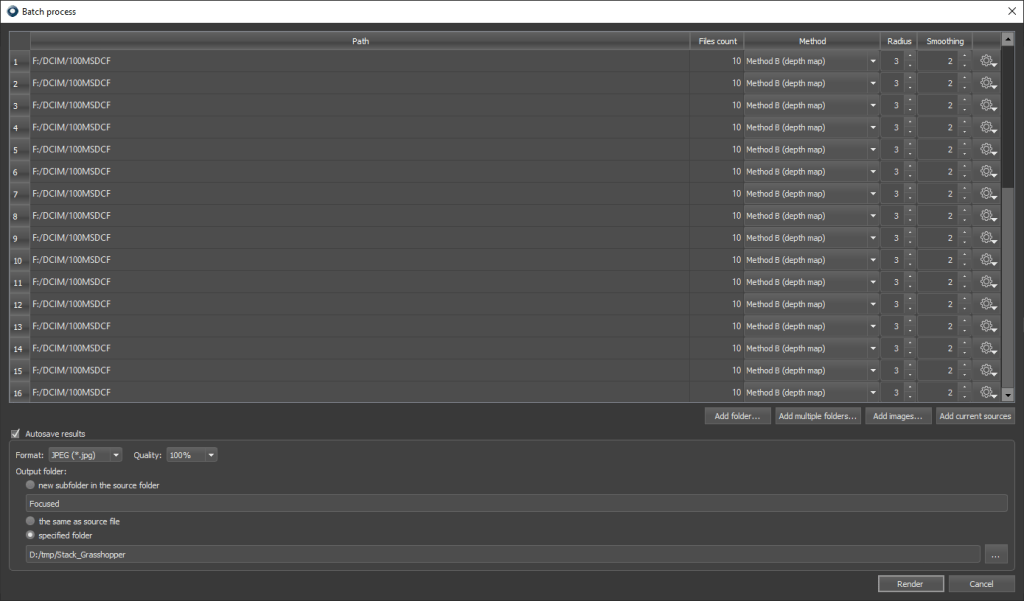
In this first test, the substacks have been calculated starting from packets of ten images, the total set of 227 images (corresponding to 25 substacks calculated on the basis of 10 photographs and overlapping of 1 image) takes 14 minutes (to be precise 13’44.41″ on an Intel CORE i7 vPro 8th Gen processor). These times obviously vary, depending on processor configuration and graphics card, but the process is extremely faster than stacking in one way the 227 images.
This version, in fact, is remarkably improved in terms of speed performance; moreover, the new preview rendering functions allow us to see the final result obtained by applying different parameters and algorithms, in almost real-time. Once the substacks creation operation is finished, the images are accessible in the default folder.
Import the files into Helicon as they were normal images, and start the calculation process.
Since the number of images is very limited (a little less than thirty in this case) in less than five minutes the result is ready to be displayed, you proceed to the image edition where necessary and export the final image in your preferred image processing software.
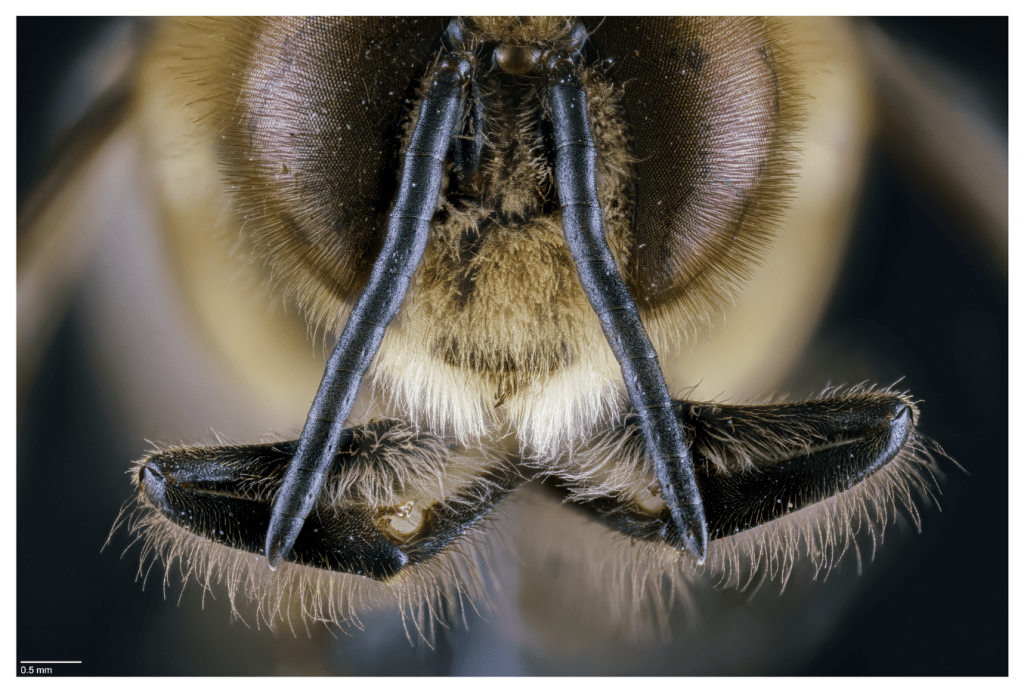
On the first test I performed, the result is definitely good, I only had to do a couple of retouching and nothing else.
This is the resulting output, I must improve a bit the technique of editing using multiple layers, but this is my first slabbing, then forgive me! 🙂
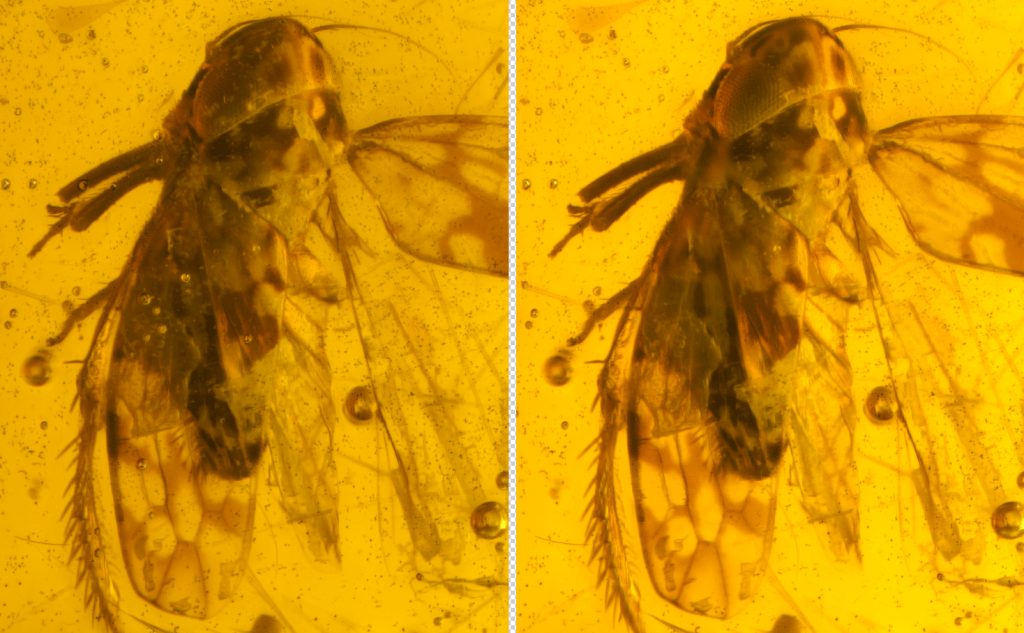
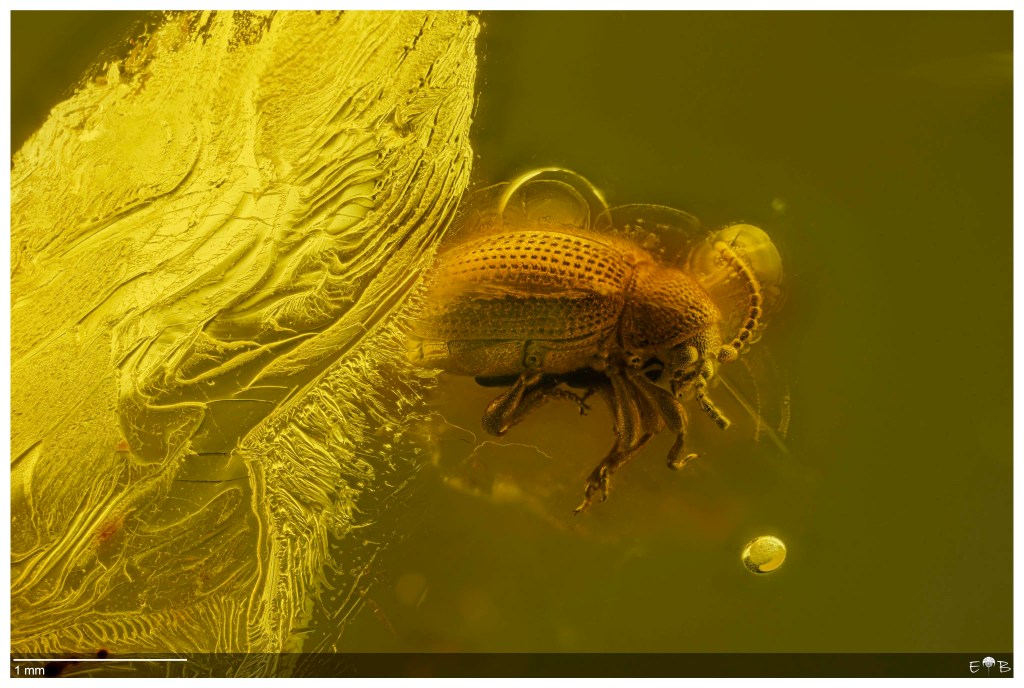
…and with inclusions in Amber?
Below is a comparison between an image obtained using the “classic” method (stacking without slabbing) at left, and at right the same using the slabbing. From a set of 198 images, I’ve created 11 substacks composed of 20 images, compiled in Helicon, and retouched with the tools available in the software. Looking that there are a lot of bubbles and debris in the foreground, using the retouching tools was quite easy to remove the imperfections obtaining a clean and nicer image.
Below is a Coleoptera Ptinidae as calculated without applying a sub-stacking procedure and after having processed the image using the sub-stacks previously described method and in Photoshop. This method greatly increases the possibility of “popping up” the insects, removing all the visible defects (dust, scratches, other debris…) that are located in between the camera and the insect.

The importance of performing a sub-stacking procedure to correct for the presence of obstacles (fractures, debris, small inclusions, etc.) located in front of the main subject, particularly in the case of inclusions in amber, is clearly demonstrated by comparing the two images shown below. The first photograph presents the raw image, as obtained without any correction of the individual stacks, whereas the second shows the final result, after removal of the yellow color cast typical of amber.
As can be observed, the image has been cleaned, a denoise filter has been applied to the image (using Topaz Photo), and Adobe Camera Raw was used to balance both color and sharpness.
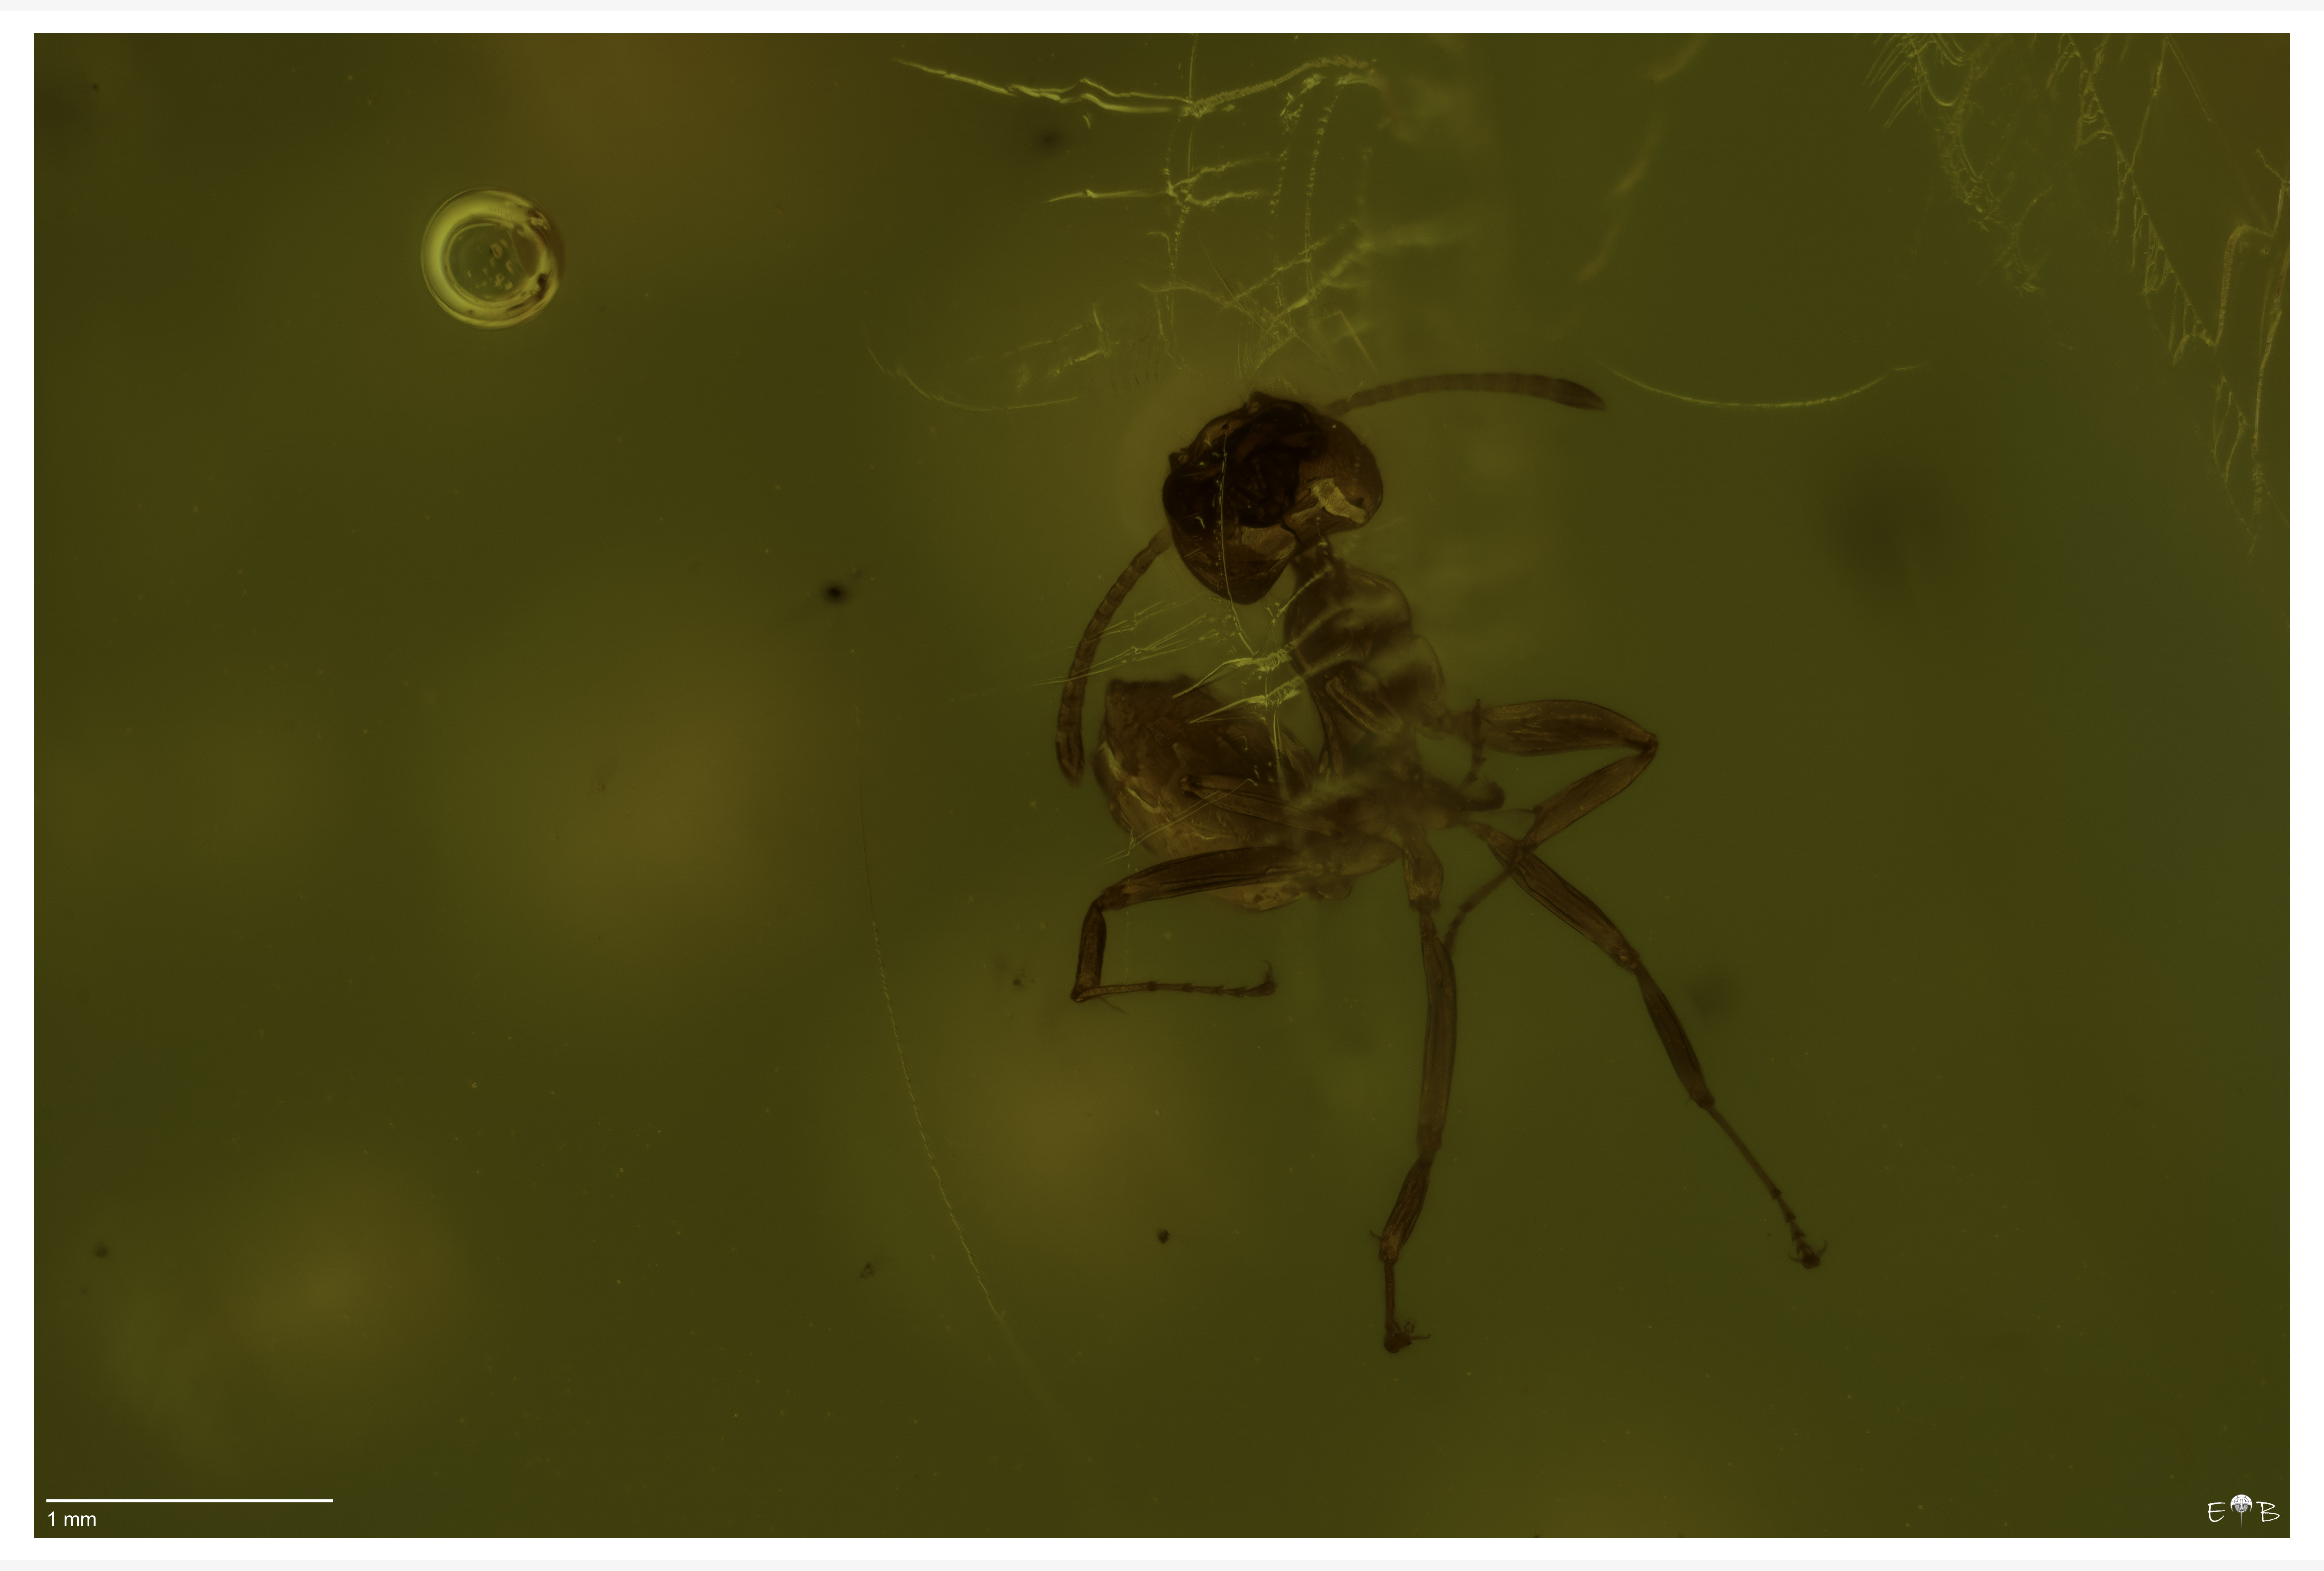
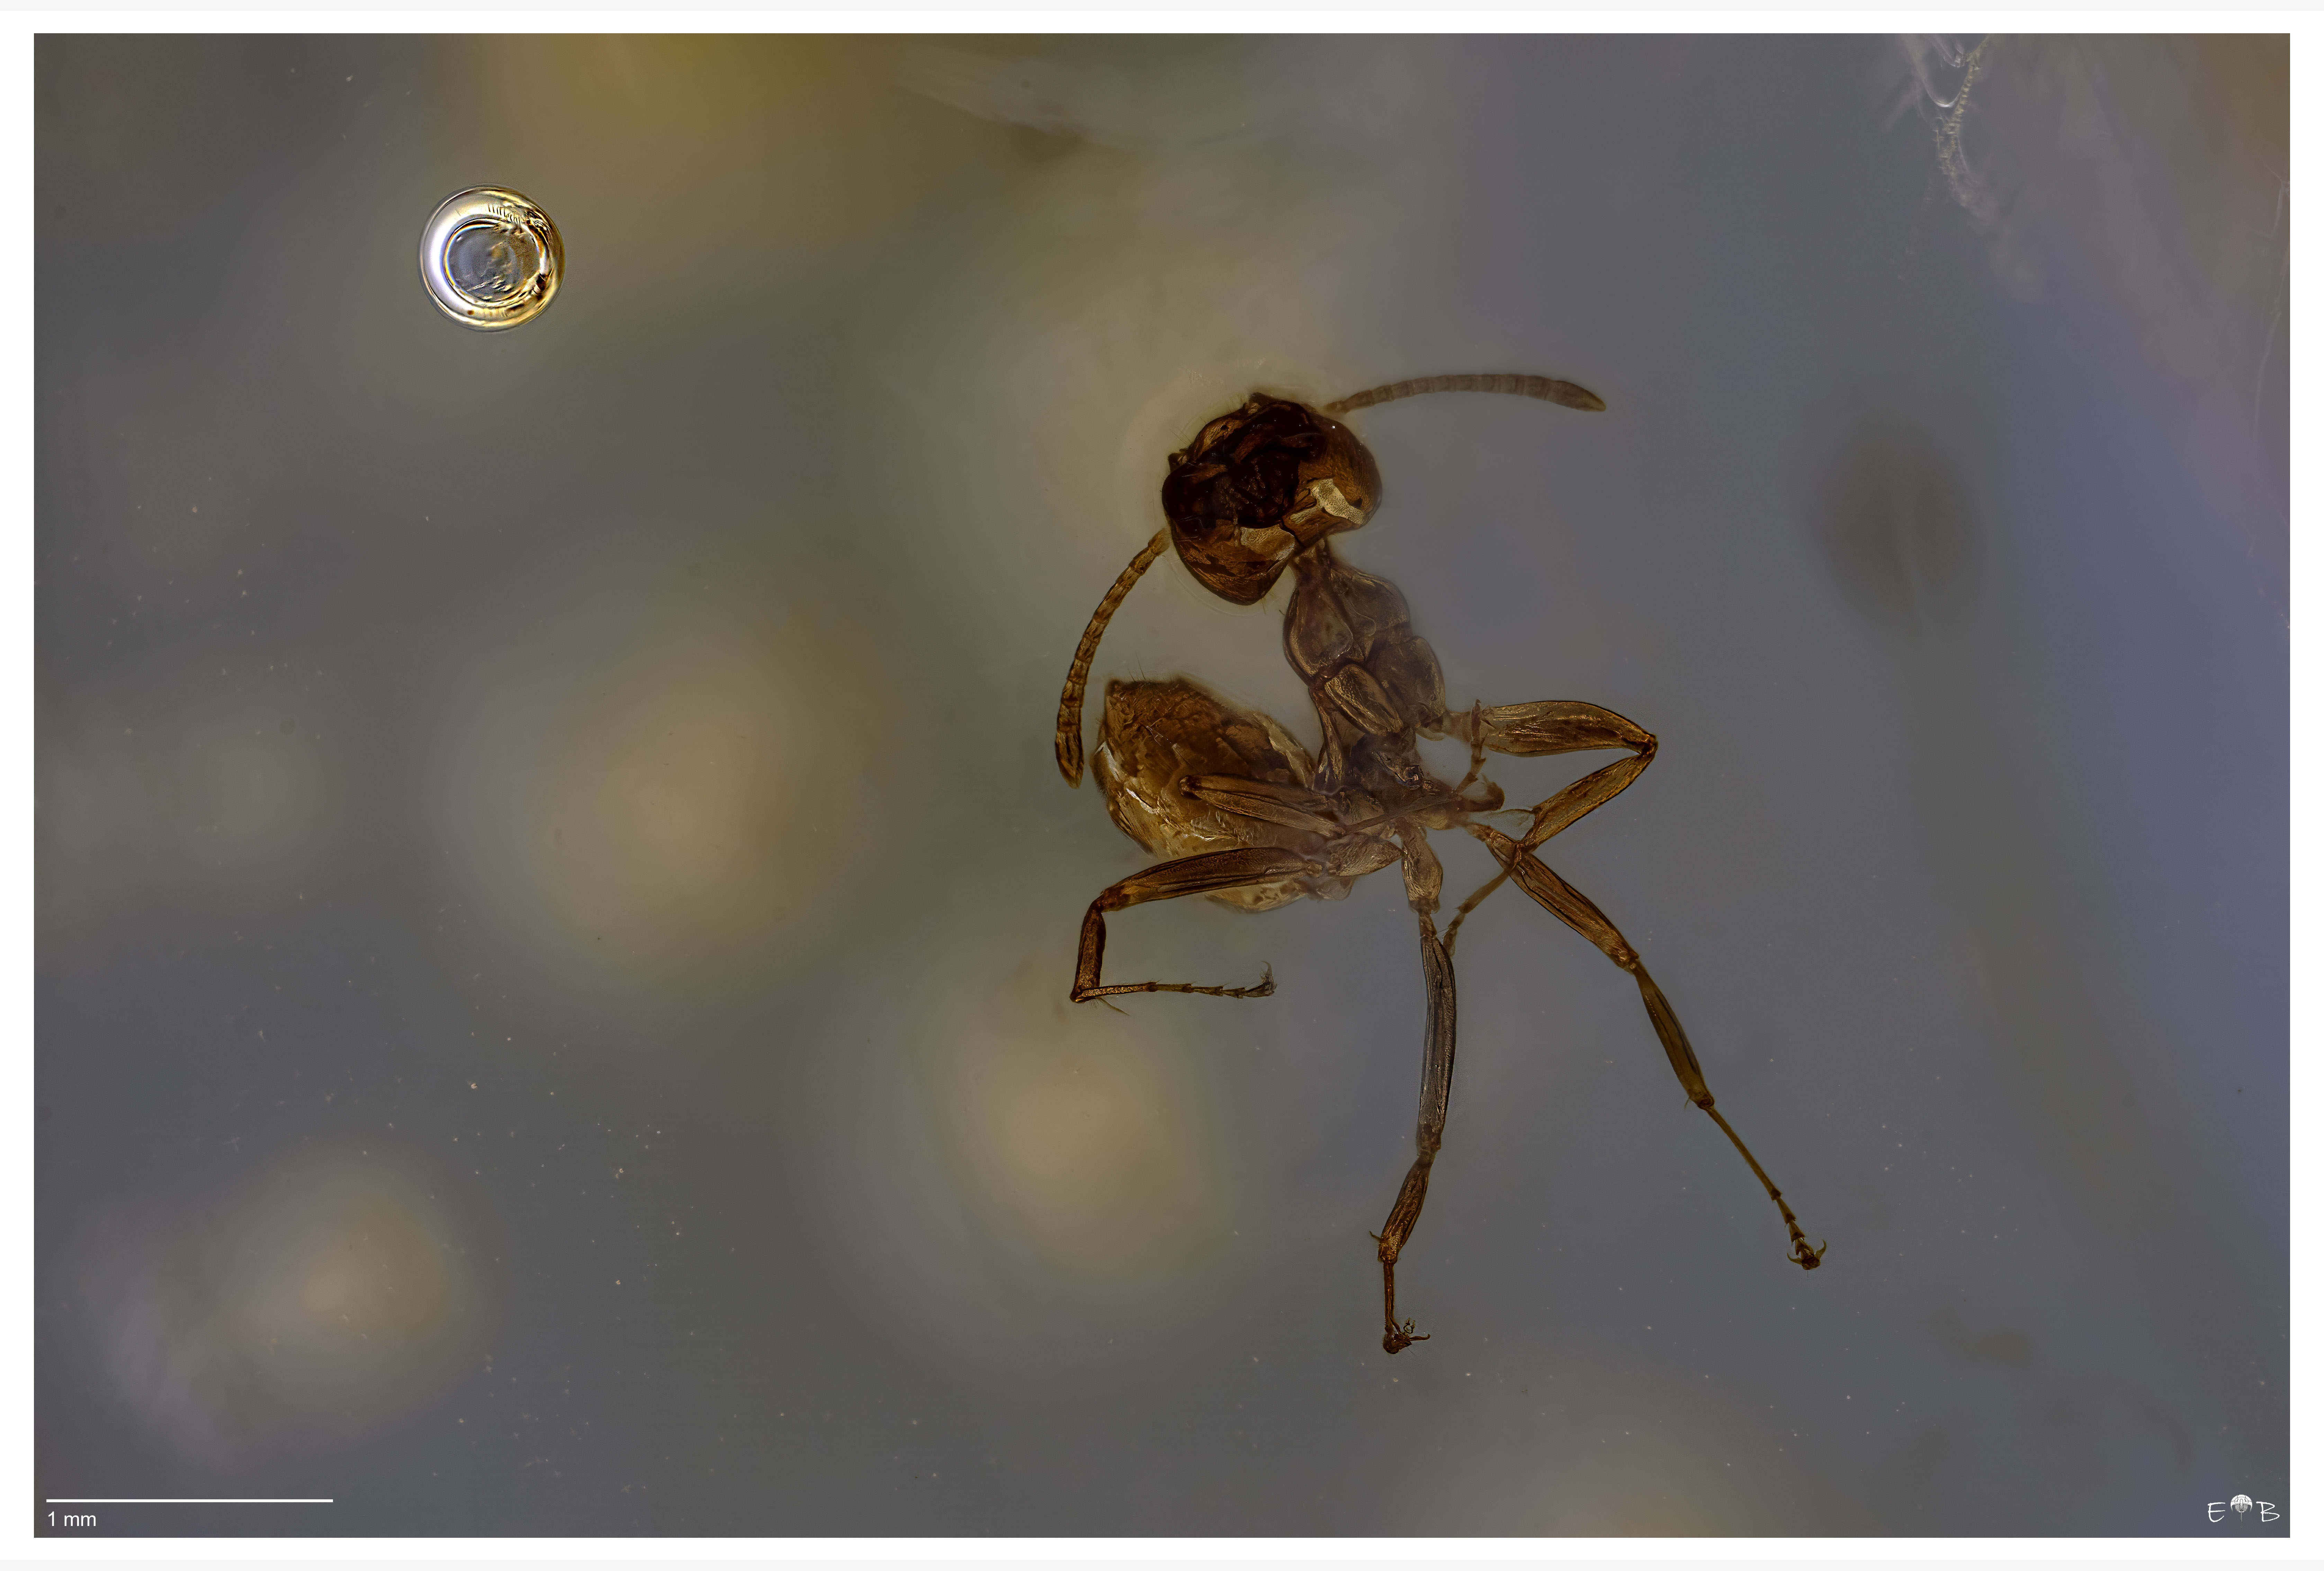
The final image (click on the arrow >) is the result of a fusion of 130 individual photographs, acquired with a step size of 15 µm in order to cover the entire “volume” of the subject. This step size may vary depending on the optical characteristics of the microscope objective used. Each individual sub-stack was calculated by merging 8 separate frames, a value that likewise varies according to the number and complexity of inclusions present within the amber.
Happy (sub)stacking!
