When we start a process of image acquisition, the goal is to have a single frame that covers the whole subject, and this result depends in general on the type of lens/objective used. It may happen however that the subject has a large size, it is then necessary to acquire individual sections to create a mosaic covering the entire area of interest. This technique is often used when you want to obtain images in which there is the need to maintain the finest detail possible or print photos in very big formats.
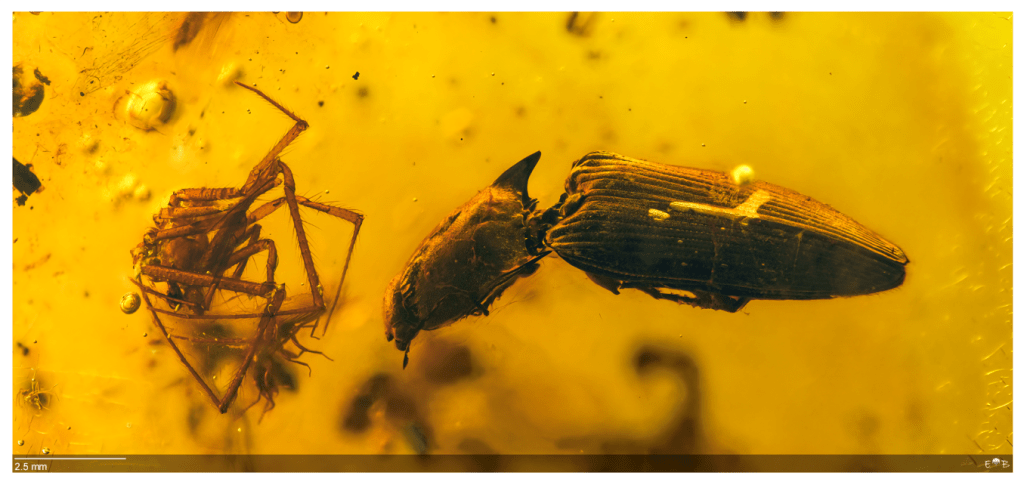
In the example that I show you on this page, I want to frame an Elaterid beetle and a spider in a single scene; it was therefore necessary to acquire two stacks (composed of 96 images each) to cover both subjects.
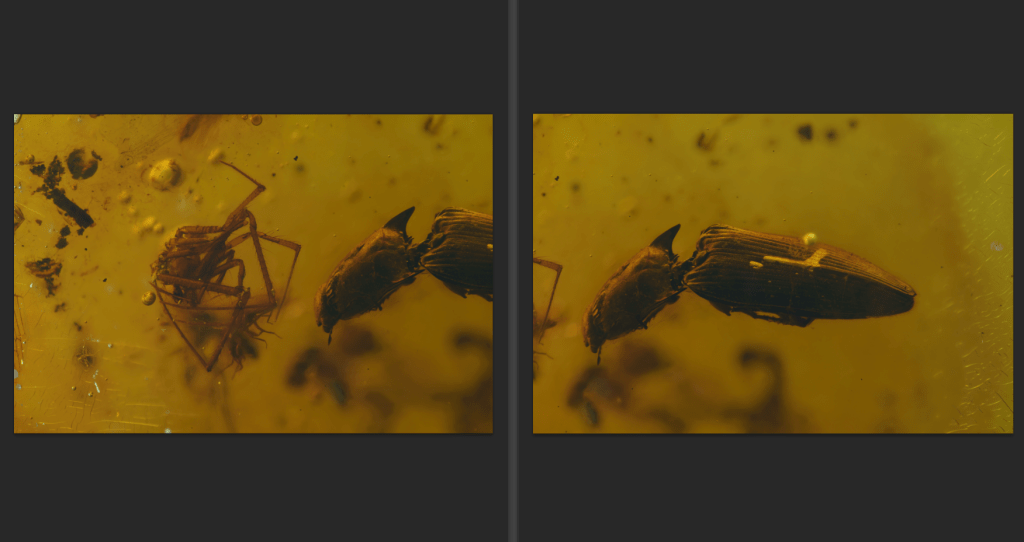
When you create a mosaic, it is important to have a good degree of overlap between images, this helps the algorithm to find the same morphology/geometry in the adjacent photos, and to create a seamless transition between photos. In general, it is good to have an overlap of not less than 30%-40%.
The procedure described is based on the use of Adobe Photoshop (an old version, but that does its job), but there is a lot of open-source software allowing to perform similar operations, with good results. You can have a look at the Microsoft Image Composite Editor that works very well. Unfortunately, it seems that this software isn’t available anymore, but you can download a recent Windows 64-bit release (v.2.0.3) from here, or try different software from here.

The interesting thing about PS (and Camera Raw add-in) is that it can import the .dgn format (16bit) created in output by Helicon Focus software, keeping the color levels and metadata.
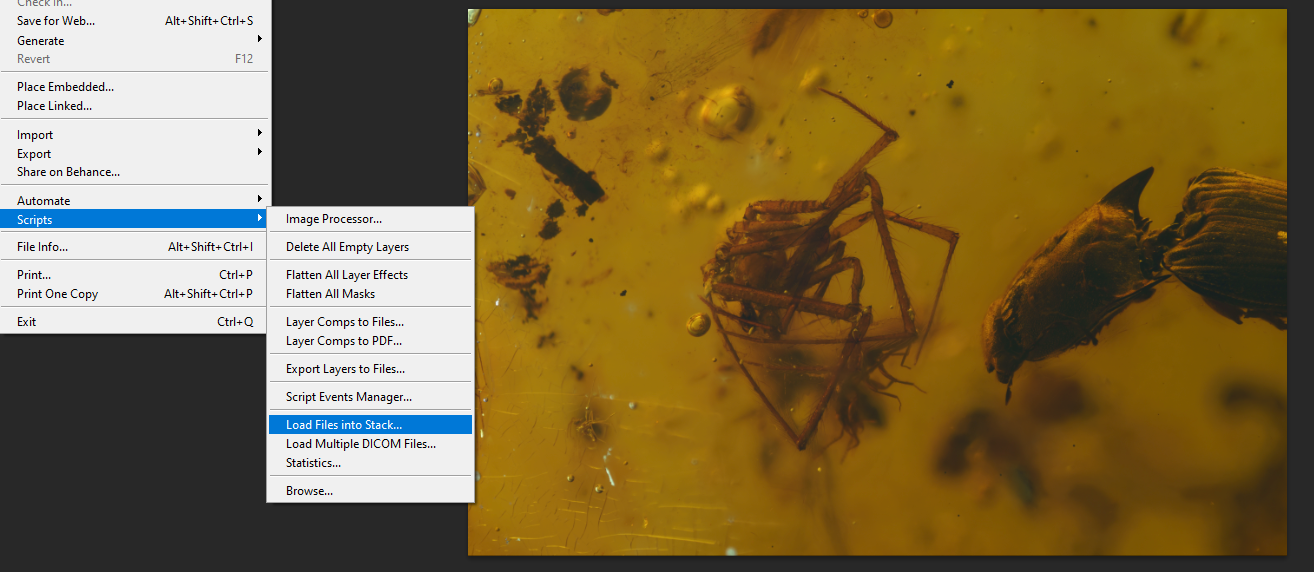
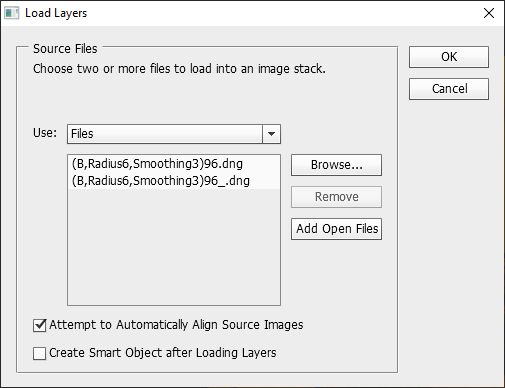
After having imported the images into the Adobe platform, let’s start to create a new intermediate stack where the common parts will be roughly overlapped. This operation is launched from the menu File > Scripts > Load Files into Stack… In correspondence with the Load Layer window, select the two images (click on “Add open Files“) and check the option “Attempt to Automatically Align Source Images“.
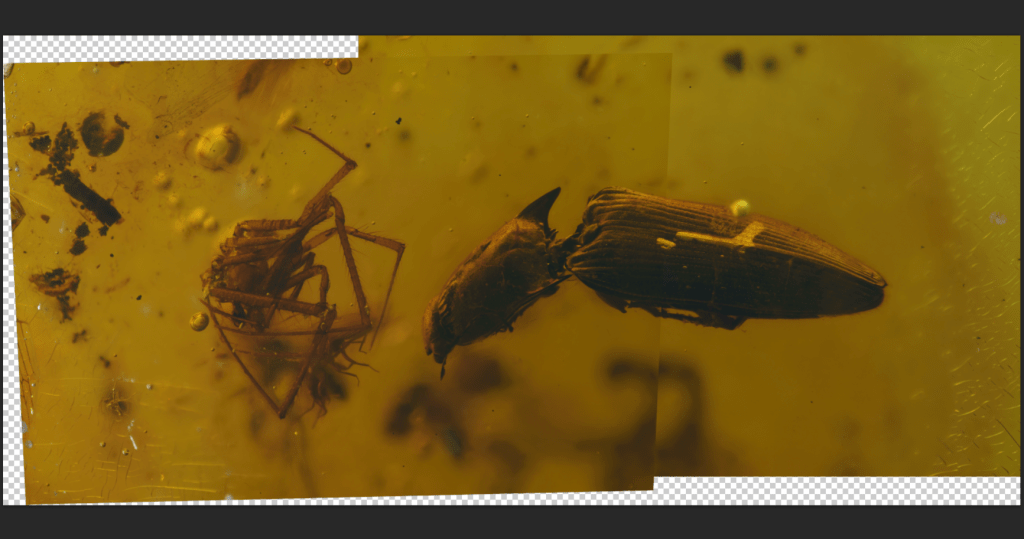
If the two images are not perfectly overlapped, or if the process fails to find the correspondence, don’t worry, sursum corda!, you can always move them manually to have a more or less correct overlap and go to the next step. Obviously, the better the images are overlapped, the better the result will be.
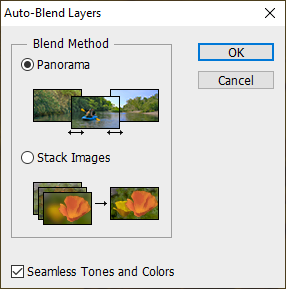
After this first step, select from the Tab “Layers” the two layers (shift-click) and from the Edit menu the option “Auto Blend Layers…“. The window that appears asks you to select the option Panorama or Stack Images. Select the Panorama option, check the “Seamless Tones and Colors” option to have a greater homogenization of colors in the overlapped areas, and confirm.
Photoshop allows you to create, in a similar way as Helicon Focus or Zerene Stacker software, image stacks, but with the small defect that it is EXTREMELY slow. It can work with stacks composed of a few tens of images, but for stacks that require the use of hundreds of frames, it is impossible to use, you risk seeing your kids become older. Also, the results obtained sometimes leave a little to be desired.

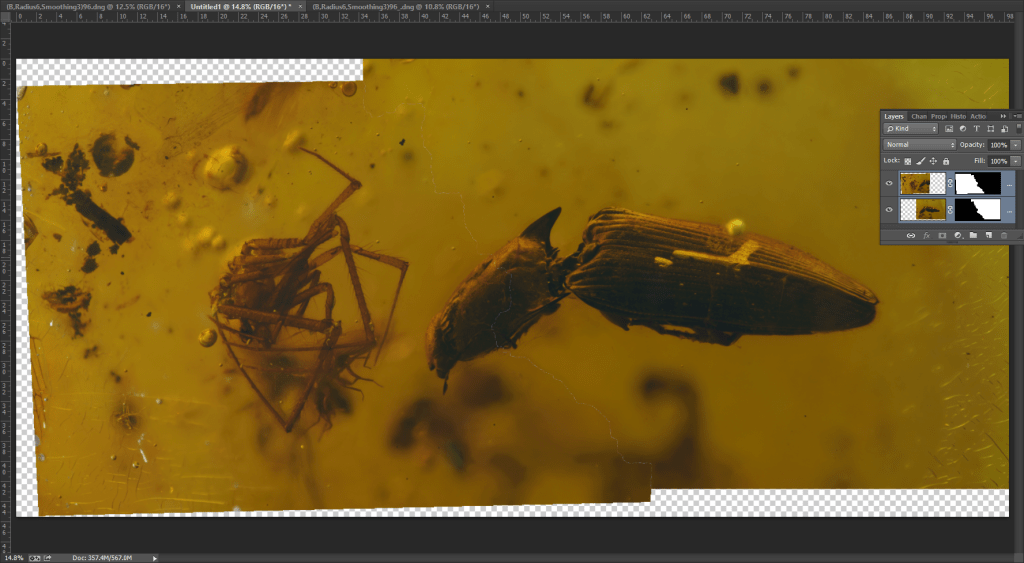
Back now to the analysis. The result obtained launching the Panorama option, is an image in which you can see the presence of a tiny white irregular line crossing the middle part of the photocomposition. The PS algorithm searches for areas that are geometrically and radiometrically similar, creating a mask in the adjacent photo and vice versa.
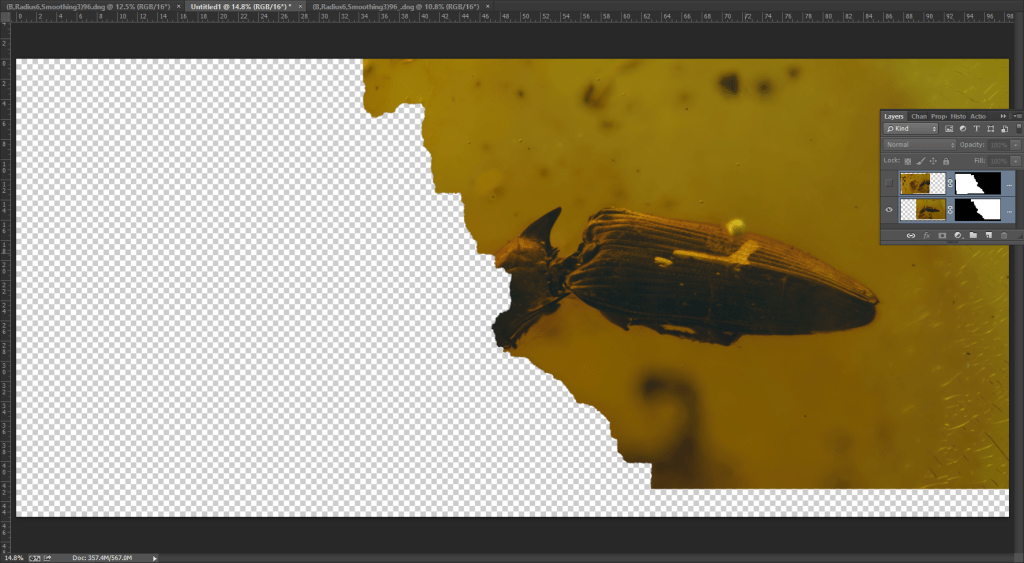
Hiding an image from the Layers Tab clearly shows how the search for similar adjacent areas worked.
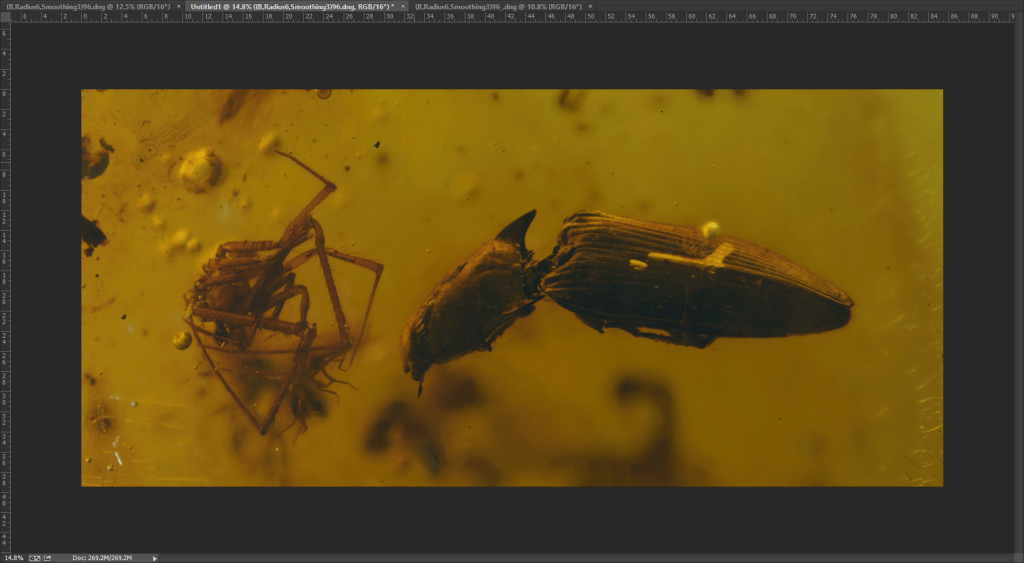
At this point, you just need to merge the two layers into a single image (Control-E, with the two layers selected) to get the result, and you are ready to make all color adjustments and apply the necessary filters for the final rendering.
Creating a big mosaic
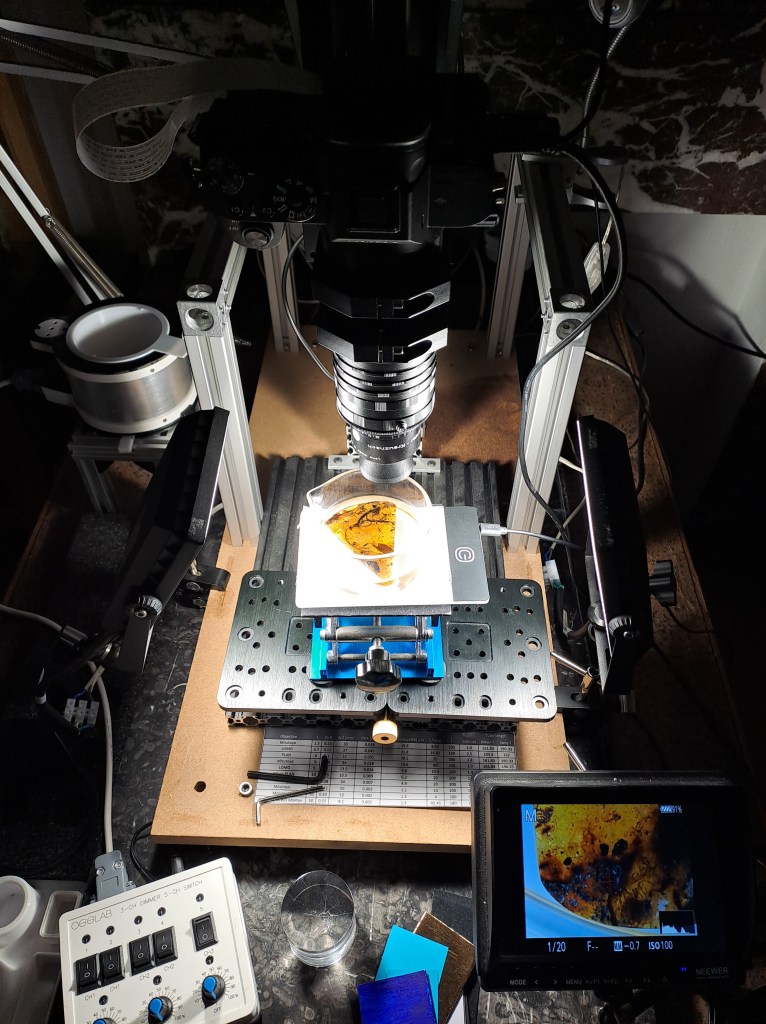
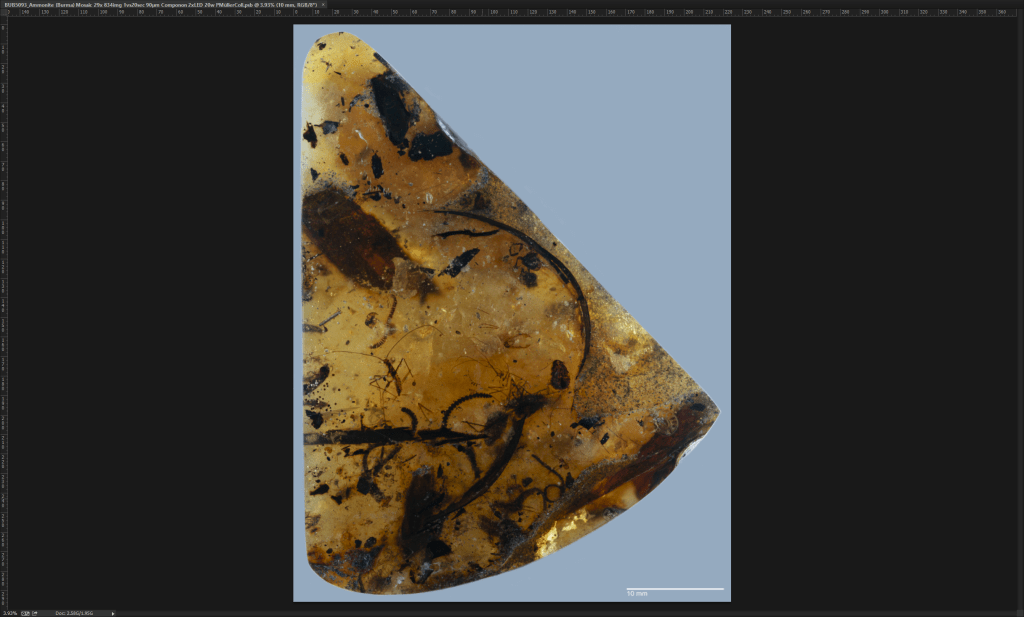
The most challenging part is when you have a large sample to mosaic. In the following example, there is a 6.5 × 5 cm piece of amber containing numerous inclusions that are interesting to photograph. I’m using a Schneider Componon 50mm f/2.8 reversed lens, which provides excellent results and covers a relatively wide area. The lighting system consists of two 20W LED panels carefully oriented to ensure uniform illumination over the sample, which is immersed in glycerol, as shown in the following image.
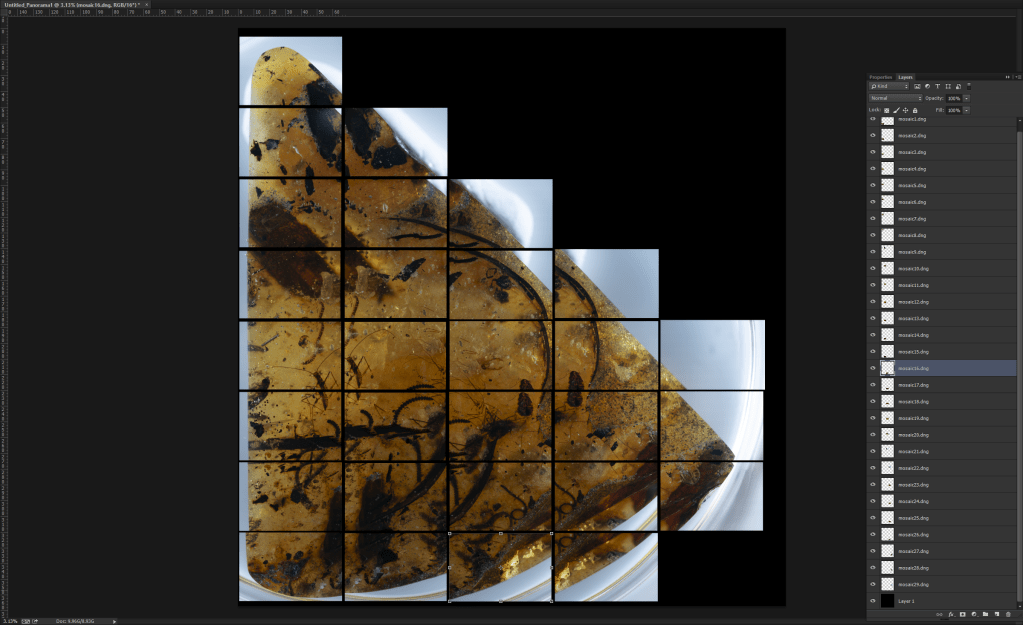
To cover the entire specimen, 29 stacks were required, each composed of approximately 30 individual frames, resulting in a total of 834 shots. The images are processed in Helicon Focus Pro (v.8.3.1), exported in .DNG format, and then imported into Adobe Photoshop. The 29 tiles are arranged on the workspace to check whether the entire area is correctly covered. The XY movement is done manually with a good overlap between each tile (~20%), but occasional errors may occur. Therefore, this validation step is crucial to avoid unwanted gaps in the final result.
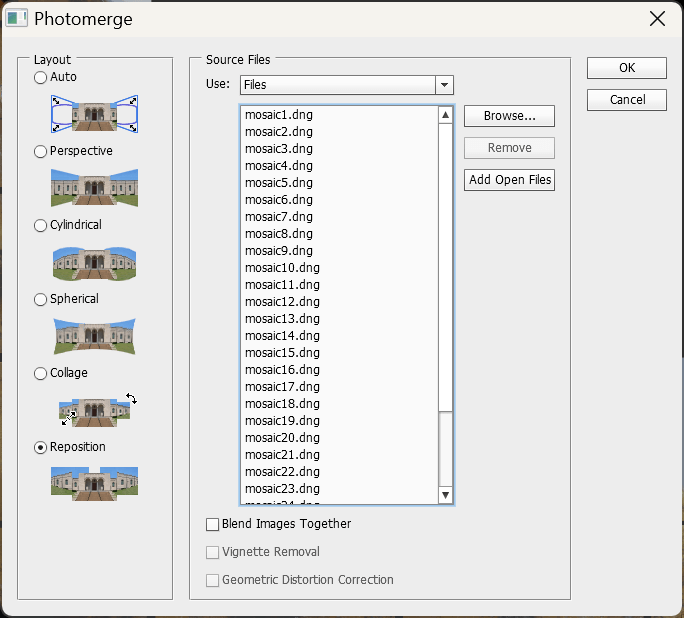
Once the first validation is complete, the next step is to properly align the tiles. In Adobe Photoshop, I use the Photomerge tool with the simplest option, “Reposition,” but I uncheck “Blend Images Together.” I prefer to manually adjust the automatically positioned tiles to fine-tune the overlap, which is generally very accurate.
The alignment process requires patience and depends on the processing power of your computer. The result is a mosaic composed of correctly overlapped tiles. When necessary, the tiles can be selected using the CTRL + Click shortcut and adjusted for better alignment. The next step is to run the Auto-Blend Layers tool (as described in the previous paragraph) to seamlessly merge all the layers, following the geometry and harmonizing the colors between tiles. The final result is a complete mosaic with properly merged tiles.

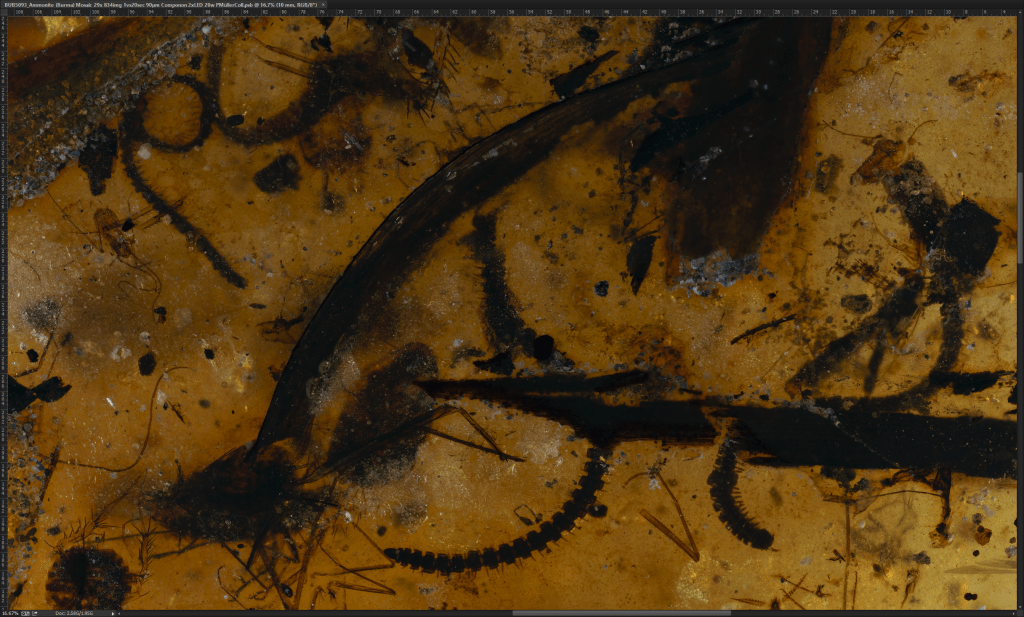
After merging the entire mosaic into a single image, I adjust the color levels and reduce noise to enhance the visibility of details. The outer edges of the amber are cleaned, and a uniform background color is added. The final image is saved as a .jpg with dimensions of 26,467 × 34,938 pixels and a file size of 60.4 MB (low compression to preserve details). The raw dataset, in .psb format, occupies 3.04 GB.
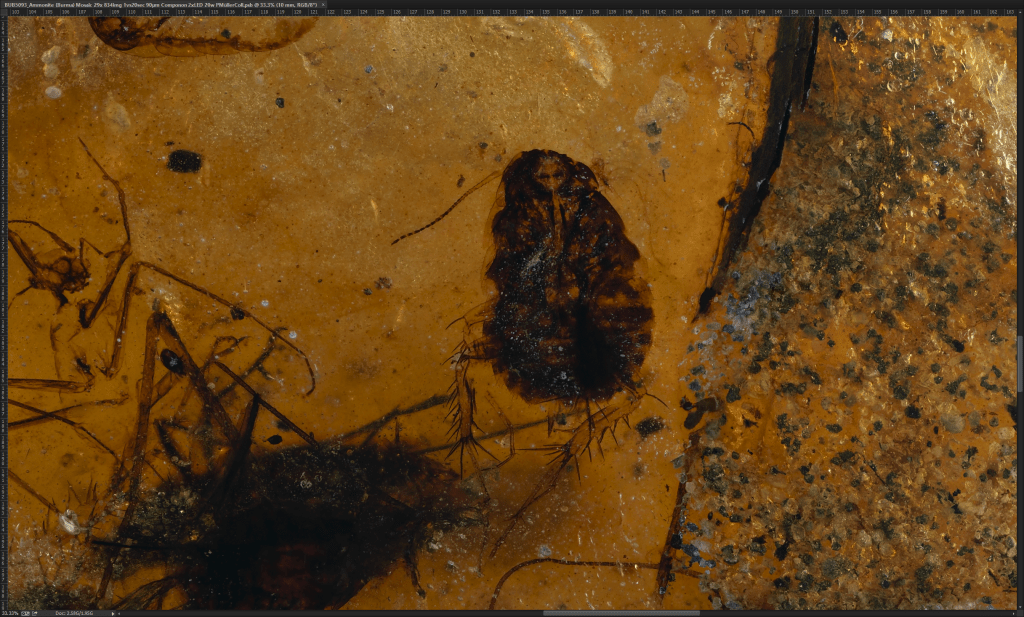
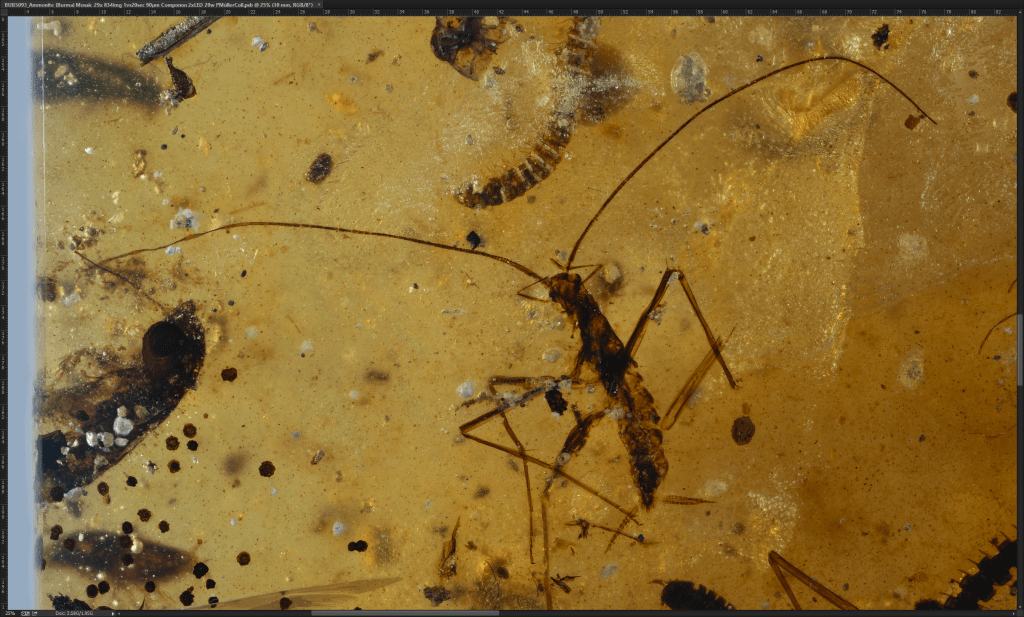
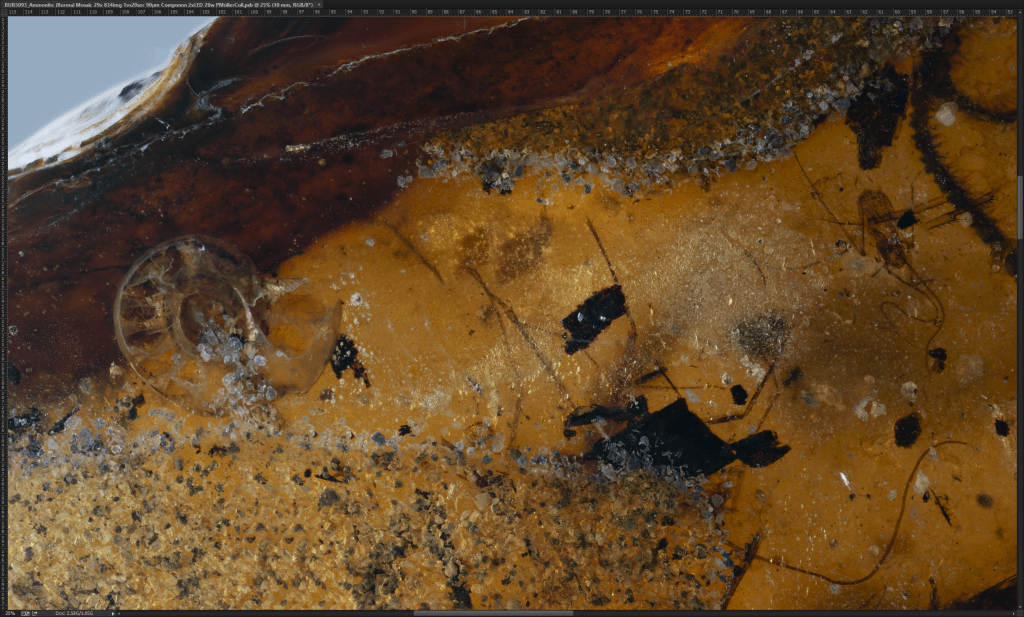
Below the final result and in the slide show some print-screen. Yes, there is also a section of a ammonite! Can you see it?
Happy Stacking!
