In this section, I present a series of imaging techniques based on varying the orientation of the light source around an amber specimen. This approach not only enhances the visualization of inclusions but also reveals surface microstructures that are often invisible under uniform 360° illumination. A complementary sub-chapter on photographing macrofossils using the same method will follow shortly, showing how widely applicable this technique can be.
Directional illumination is particularly effective in enhancing the topography of an insect’s exoskeleton. By casting light from specific angles, even subtle ridges, setae, and micro-reliefs emerge with extraordinary clarity—details that would otherwise be lost under diffuse lighting. To capture these structural nuances comprehensively, the specimen must be photographed multiple times, each under a distinct lighting direction. The next logical question is: what happens when we merge these differently illuminated sequences into a single composite image?
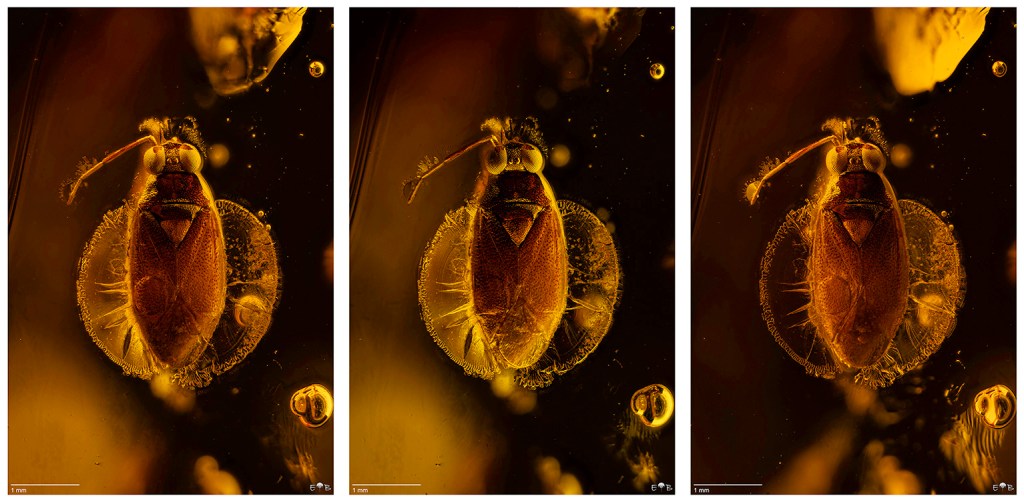
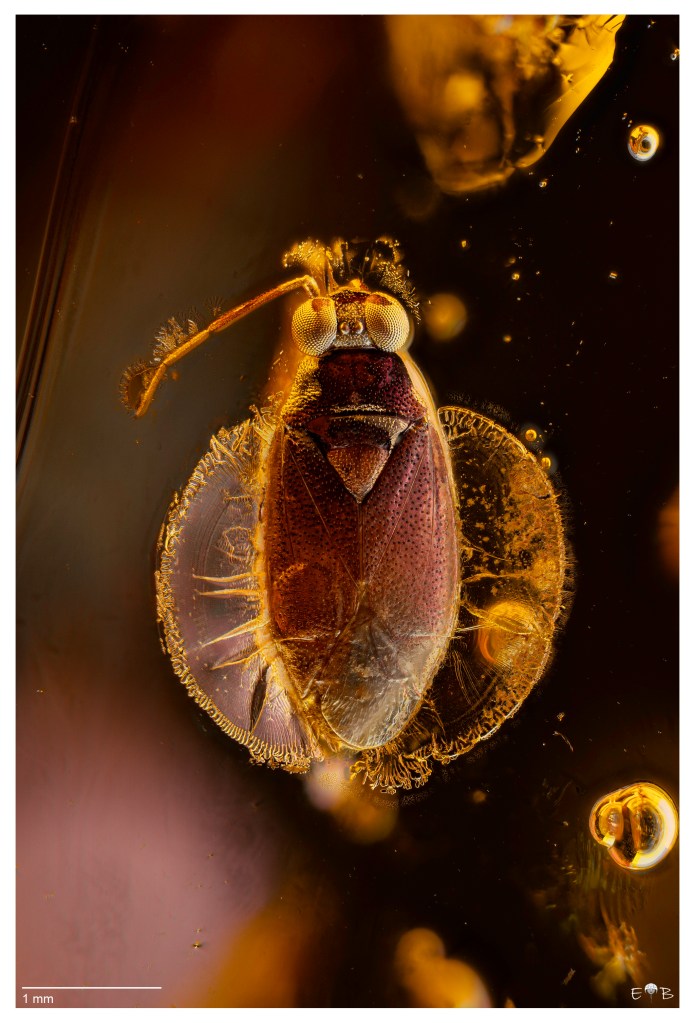
The specimen chosen for this demonstration is a Miridae (Electromyiomma weitschati), included in the amber collection kindly provided by Artur Taszakowski (University of Katowice). The insect was photographed under three controlled illumination directions—right, left, and frontal—using the 180° directional mask provided with the OGGLAB WB120EB illuminator.
Each orientation brings out specific morphological traits, so combining them offers a more complete and informative visualization.
For each lighting direction, I acquired a stack of 77 frames to cover the full depth of the hemipteran, using a step size of 15 µm. The process was repeated after rotating the mask, taking special care not to disturb the specimen between sequences. Each stack was rendered in .DNG format using Helicon Focus Pro, ensuring the highest possible fidelity.
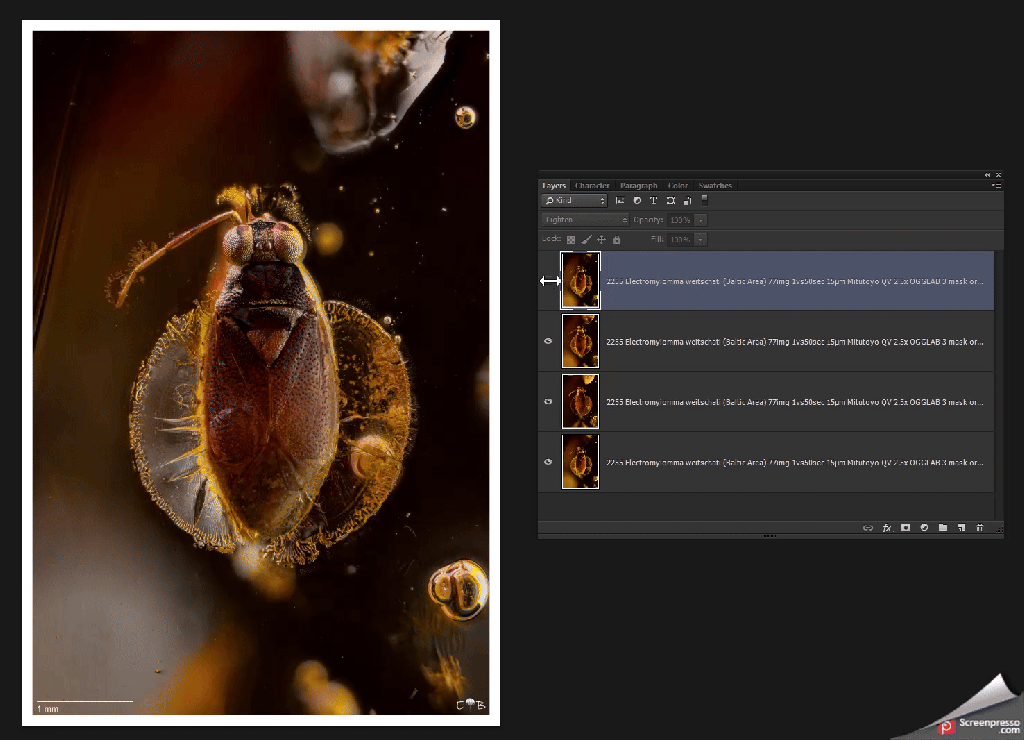
The resulting files were then processed in Adobe Camera Raw for color calibration, histogram correction, and global sharpening, followed by noise reduction in Topaz Photo. Once optimized, the three images were imported into Adobe Photoshop and aligned using File > Scripts > Load Files into Stack, with Attempt to Automatically Align Source Images enabled. Despite using an older version of Photoshop, the alignment was remarkably precise—an essential prerequisite for successful layer blending.
To create the composite, the aligned images were blended using the luminosity blend mode. By making subtle positional adjustments to the layers—sliding one slightly forward or backward relative to the others—it becomes possible to modulate the final appearance, selectively enhancing different surface features depending on how each illumination contributes.
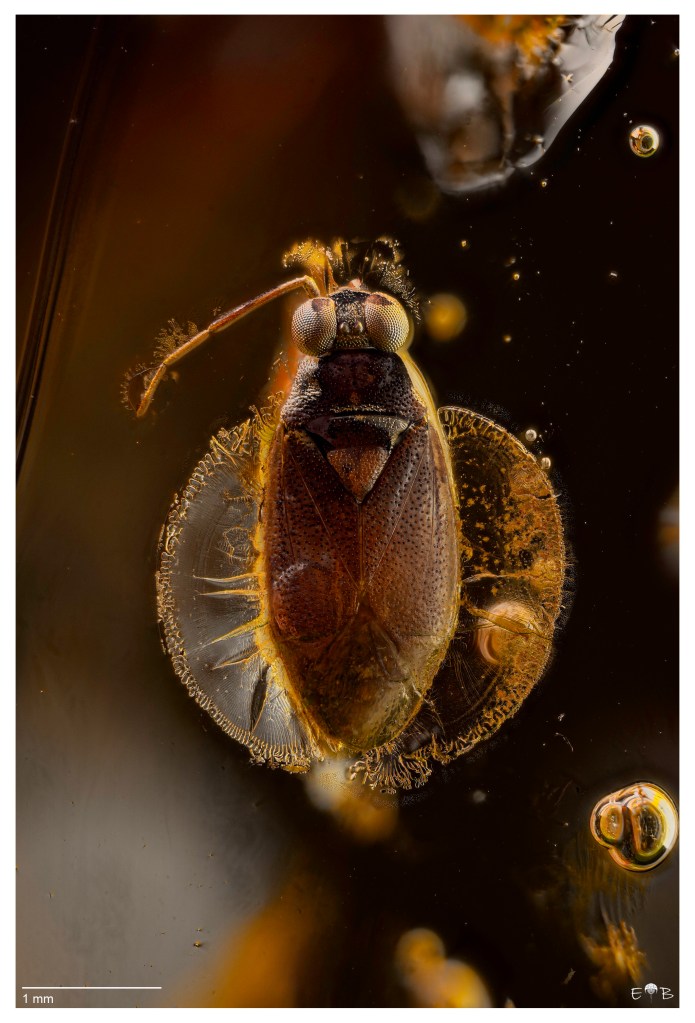
This method reveals a richer, more nuanced representation of the insect’s morphology, as illustrated in the final images below.
Happy Stacking!
