
I’m about to share my review of a stacking program that I find particularly interesting — not only because it was developed by a good friend of mine, Luca Lista, but because it offers powerful and unique features that I haven’t found elsewhere, not even in Helicon Focus (which I use extensively, to be clear).
The software, aptly named ShineStacker, is open-source and completely free to download from the following link: https://github.com/lucalista/shinestacker.
Developed in Python, ShineStacker is being improved at an impressive pace. Luca, besides being a highly skilled developer, is also remarkably open to feedback — often implementing new features or modifications upon request (when feasible, of course) in record time. This makes ShineStacker a constantly evolving and dynamic tool.
As with any rapidly growing software, you may occasionally encounter minor bugs — don’t hesitate to contact Luca directly if you run into any issues.
The software is compatible with Windows, macOS, and Linux, ensuring accessibility for all users.
Getting Started
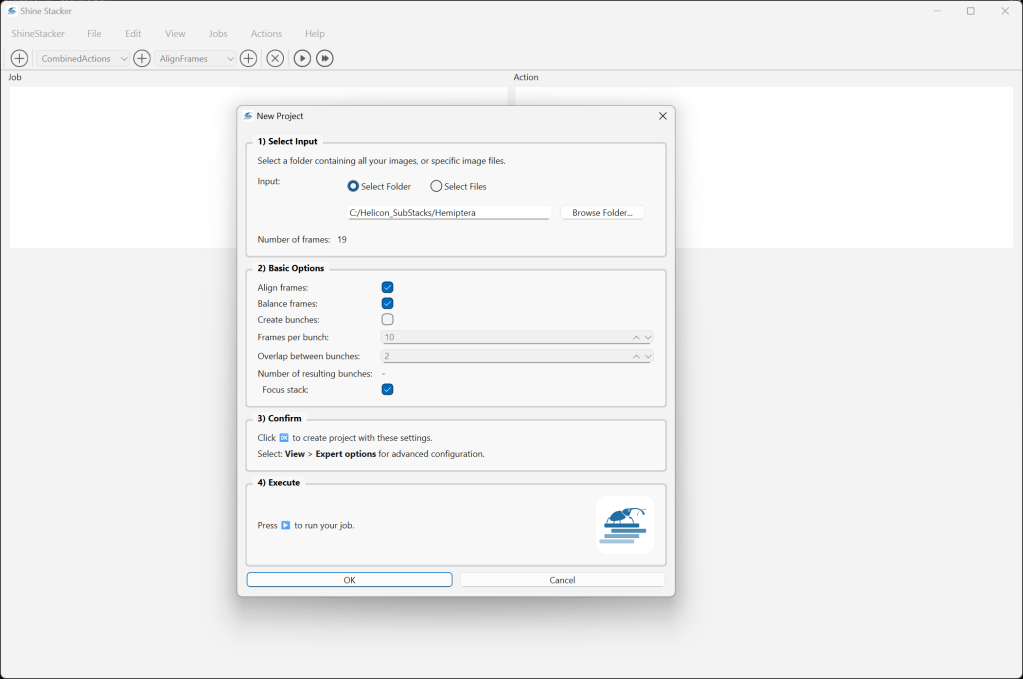
Upon launching ShineStacker, you’ll be asked to select the folder containing your images (.tif or .jpg), in either 8-bit or 16-bit format. Depending on your computer’s processor, a small alert window may appear, notifying you that the processing time could be relatively long if you’re working with a large image set.
The main interface is divided into two sections.
The upper section displays the main menus and lists the actions that the program will execute during the stacking process.
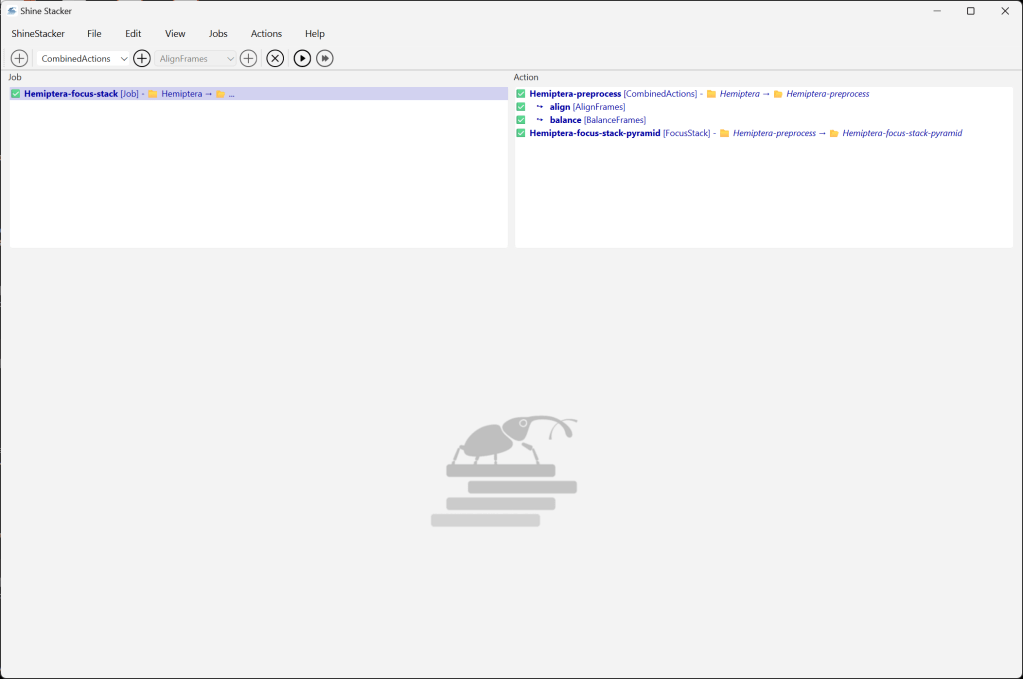
You can keep the default parameters and click the “Run job” button (the arrow icon at the top), or Activate Expert Mode via View > Expert Options to manually fine-tune the parameters.
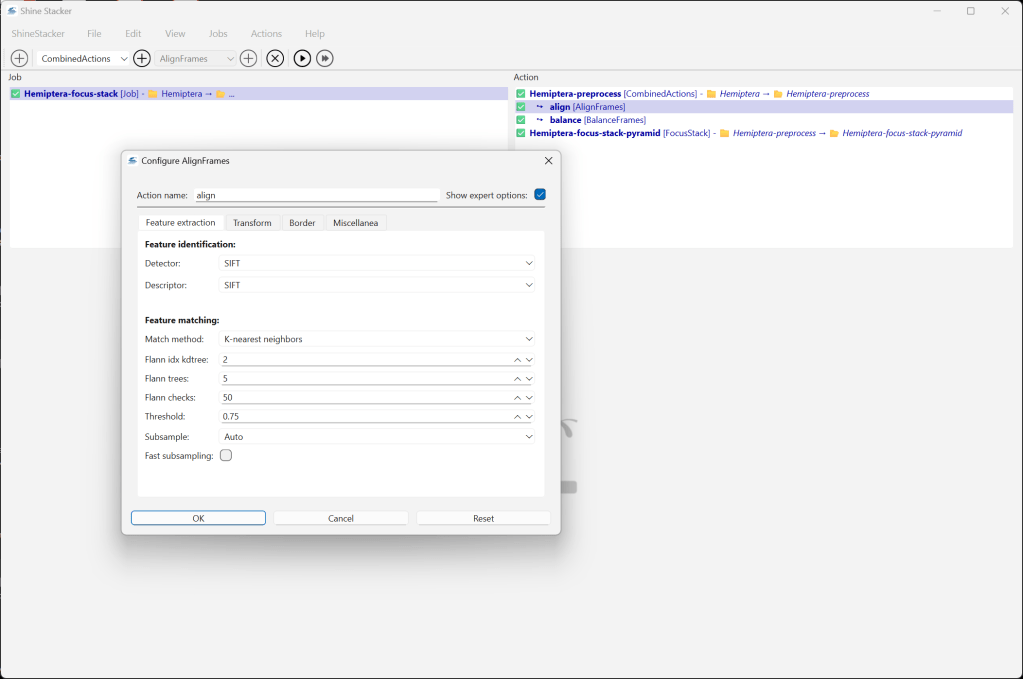
Unlike Helicon Focus (and to a certain extent, Zerene), ShineStacker allows you to adjust a wide range of settings — including:
- the Detector types (I personally prefer SIFT, which gives excellent results, though it’s slightly slower),
- matching and transformation methods,
- alignment options,
- memory management, and much more.
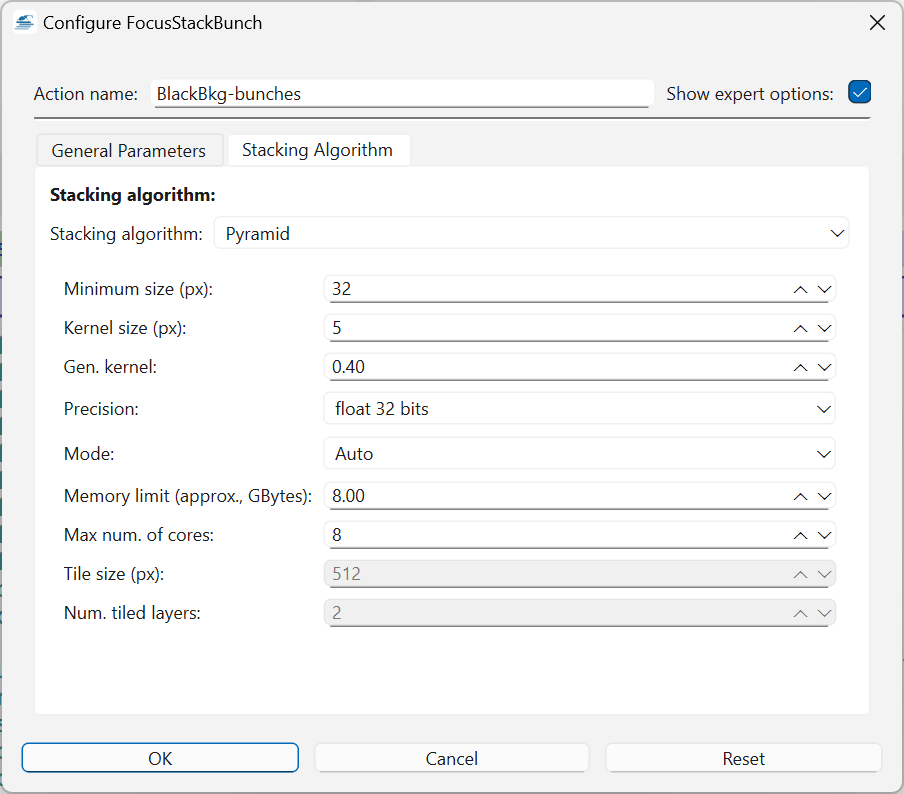
The available stacking methods are the standard Pyramid and Depth Map.
You can access these advanced settings with a double-click on the individual processes listed in the Action window.
Running the Process
Processing times naturally depend on the number of images.
In my example, I used a series of nineteen images, which took 2 minutes and 11 seconds to analyze and produce the final stacked image — an excellent performance.
Once processing is complete, progress and results are displayed in real time in the lower window panel.
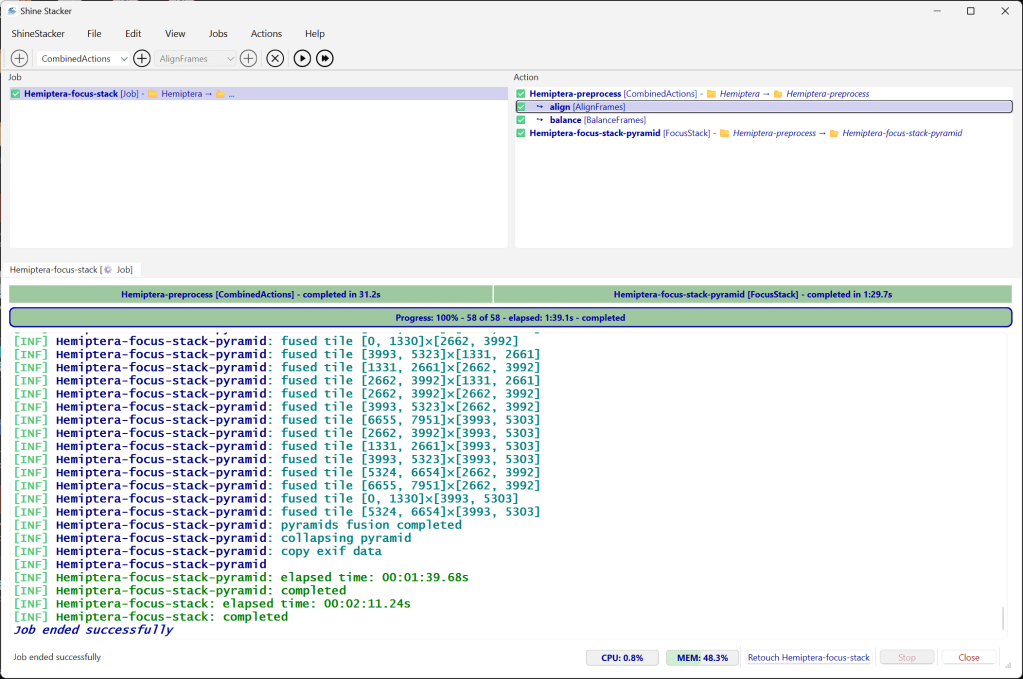
You can then open the Retouching window by selecting ShineStacker > Retouch from the menu, or simply by clicking the button at the bottom right.
The Retouching Interface
The newly opened window displays the final stacked image, which is usually of very high quality. However, if you wish to make manual adjustments, ShineStacker provides several refinement tools located on the right-hand side panel.

You can choose to work in a single view or split view, where:
- the left pane shows the source layer containing the desired details,
- and the right pane displays the final image being edited.
By pressing the X key and the up/down arrow keys, you can scroll through the available layers to select the optimal one for retouching.
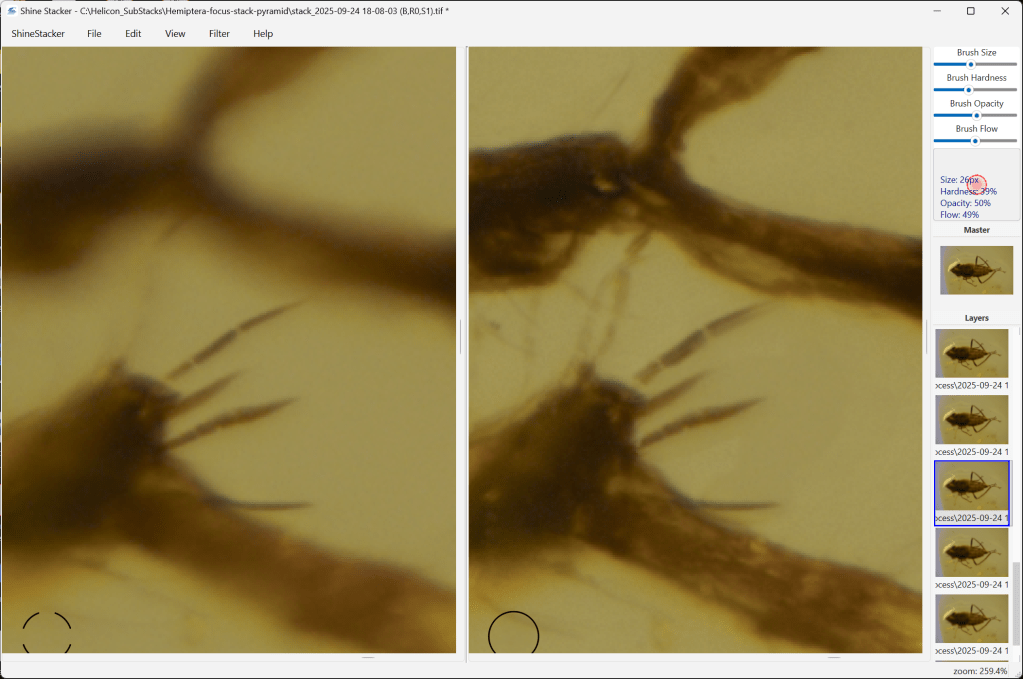
Innovative Features
One particularly innovative feature that sets ShineStacker apart is the ability to rotate the subject directly within the interface.
The sublayers rotate as well, maintaining correct alignment — a real advantage when performing precise retouching.
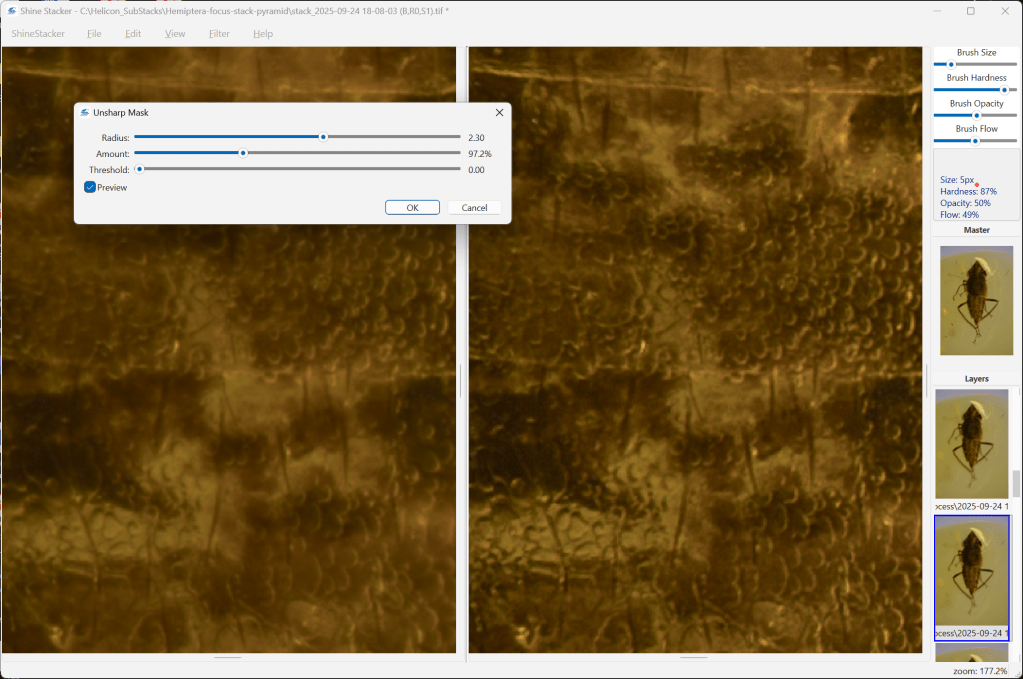
Once the retouching phase is complete, you can, if needed, adjust:
- Brightness/Contrast,
- Saturation/Vibrance,
- apply Denoise and Sharpening filters,
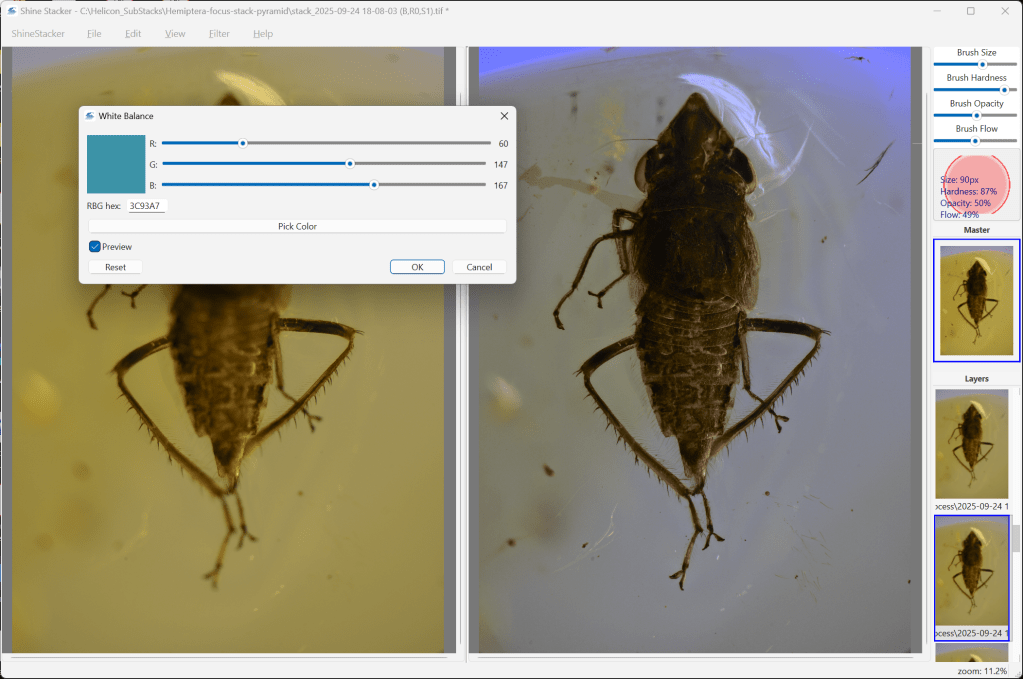
- and perform White Balance calibration.
This last function is especially valuable in my work with amber inclusions, allowing me to reduce yellow dominance and achieve colors that are impressively close to real life.
Saving and Exporting
Finally, from File > Save As…, you can export your image in .tif or .jpg format — ready for use.
If you don’t need to perform retouching, the automatically generated final image can be found in the default folder or in the same directory as the source frames.
Final image processed in Adobe Photoshop and Camera RAW.

Amber ~99Myo
Advanced Example – Working with Sub-stacks
For a second test, I imported 220 TIFF frames (16-bit, 7952×5304 pixels, ~241 MB per image).
To make the most of the retouching section, I created sub-stacks (called “Bunches” in the import window) consisting of 10 images each, with 1-frame overlap.
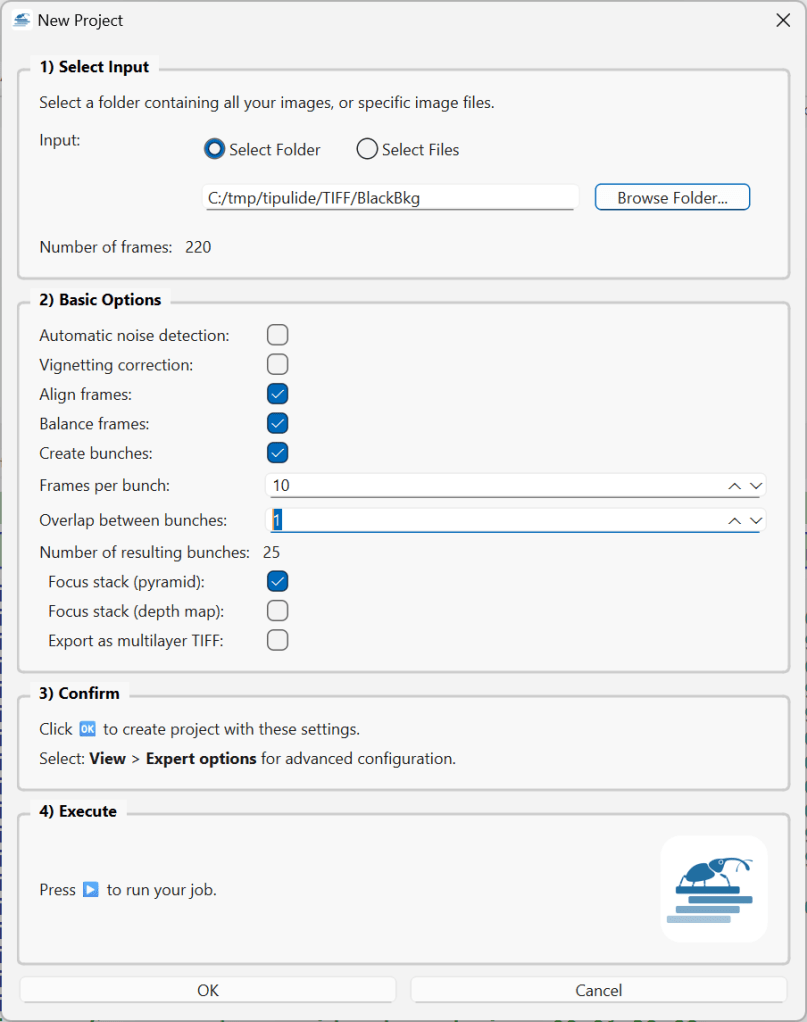
At this stage, you can already choose the focus stacking method — in this case, I selected the Pyramid method.
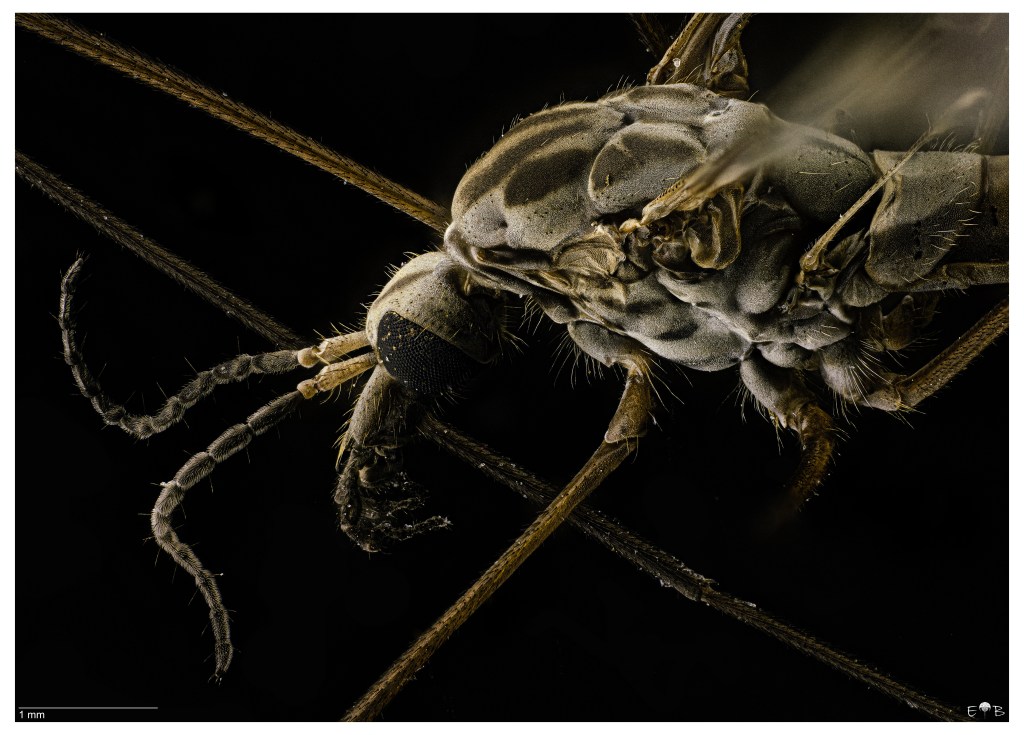
These sub-stacks can then be imported again and combined into a final image using the Depth Map method — a very useful approach when working with subjects rich in fine hairs, such as bees.
Processing this dataset took 36 minutes and 33 seconds, producing 25 sub-stacks (on 12th Gen Intel(R) Core(TM) i9-12950HX 2.30 GHz with 64Gb RAM and SSD Disk)

In the Retouch window, ShineStacker automatically imports the generated sublayers (bunches), allowing you to fine-tune or adjust parameters before exporting the final image.

Final image processed in Adobe Photoshop and Camera RAW.
Full documentation available here: https://shinestacker.readthedocs.io/en/latest/
Happy Stacking!
